Sometimes you want to automate actions in tools that Relay.app doesn't yet integrate with natively. In this tutorial, I'll explain how to make custom HTTP requests to external APIs via ‘Custom HTTP Request’ steps, and use fields from the server response in future steps.
These steps are one of Relay.app’s webhook features, like Webhook Triggers. This is one of the more advanced step types in the product, and this tutorial assumes you are familiar with working with API documentation from the services you’re integrating with.
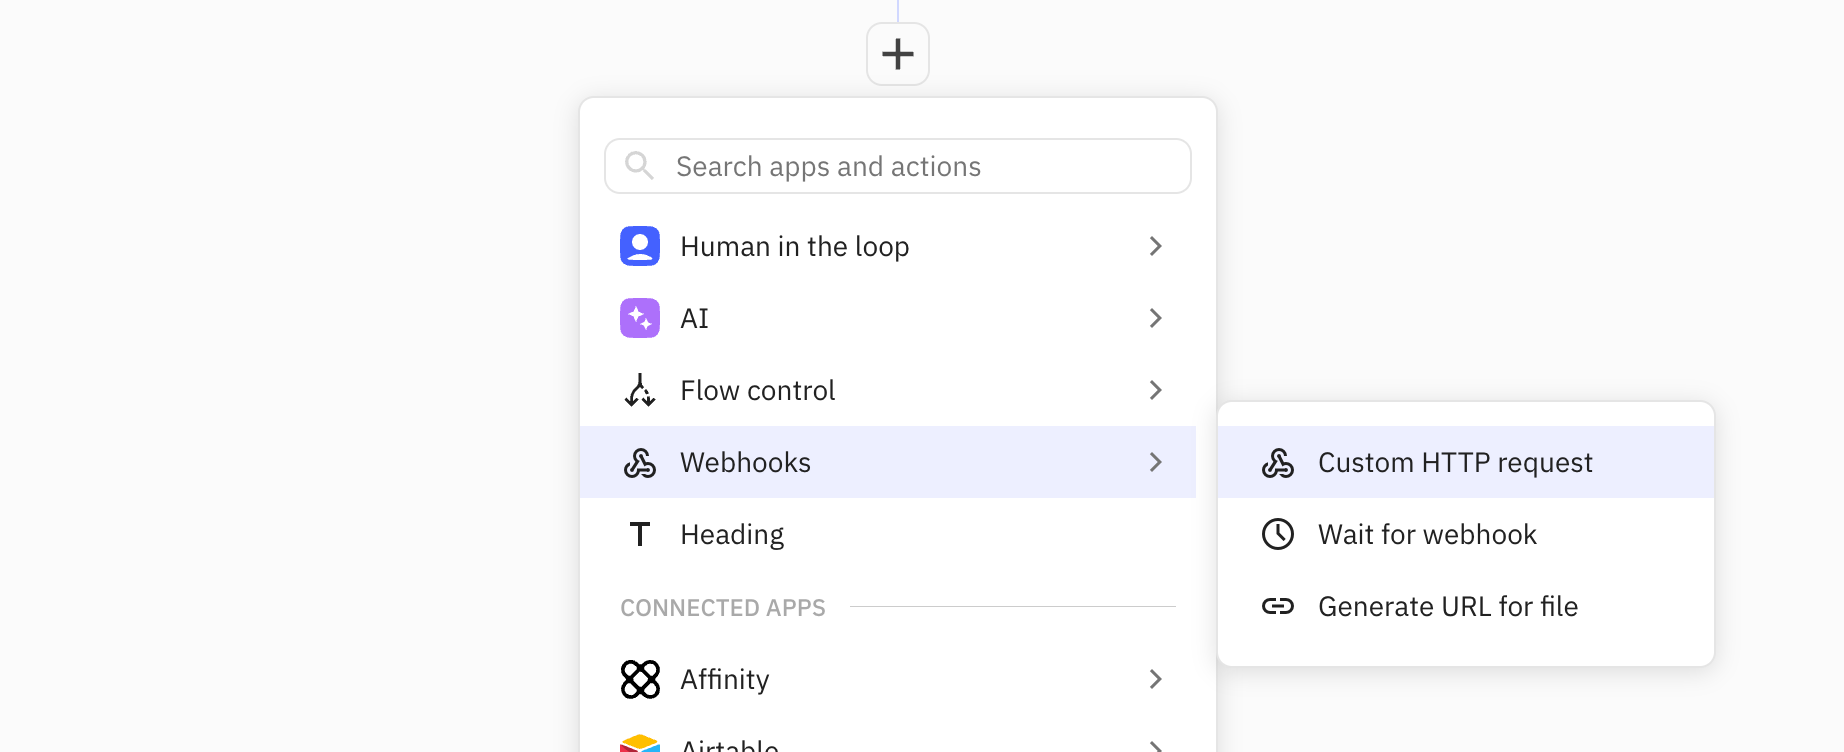
Adding a 'Custom HTTP Request' step
To get started, add a ‘Custom HTTP Request’ step anywhere in your workflow where you want to call a third-party API.
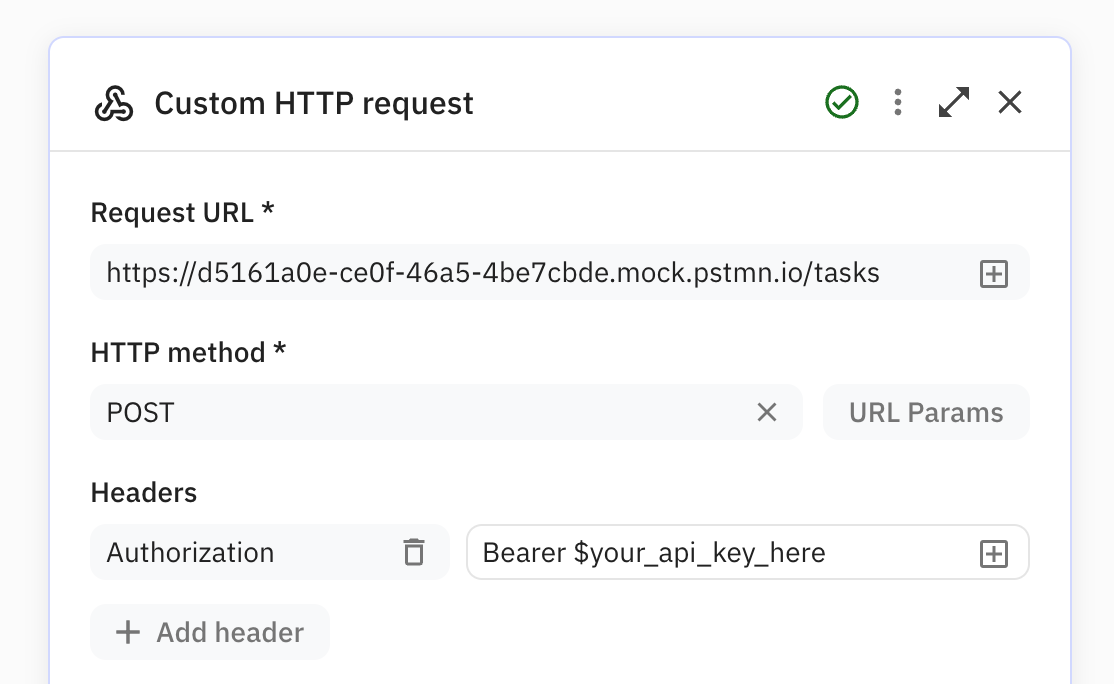
1. Top-level request configuration
The top-level request configuration consists of three parts:
- The URL of the endpoint
- The request method (typically POST)
- Optionally, any additional headers

Some APIs require you to provide additional headers beyond the ‘Content-type’ header (which we will always include). For example, you might need to include an API key in an ‘Authorization’ header. If this is the case, you can define custom headers by providing them as key-value pairs.
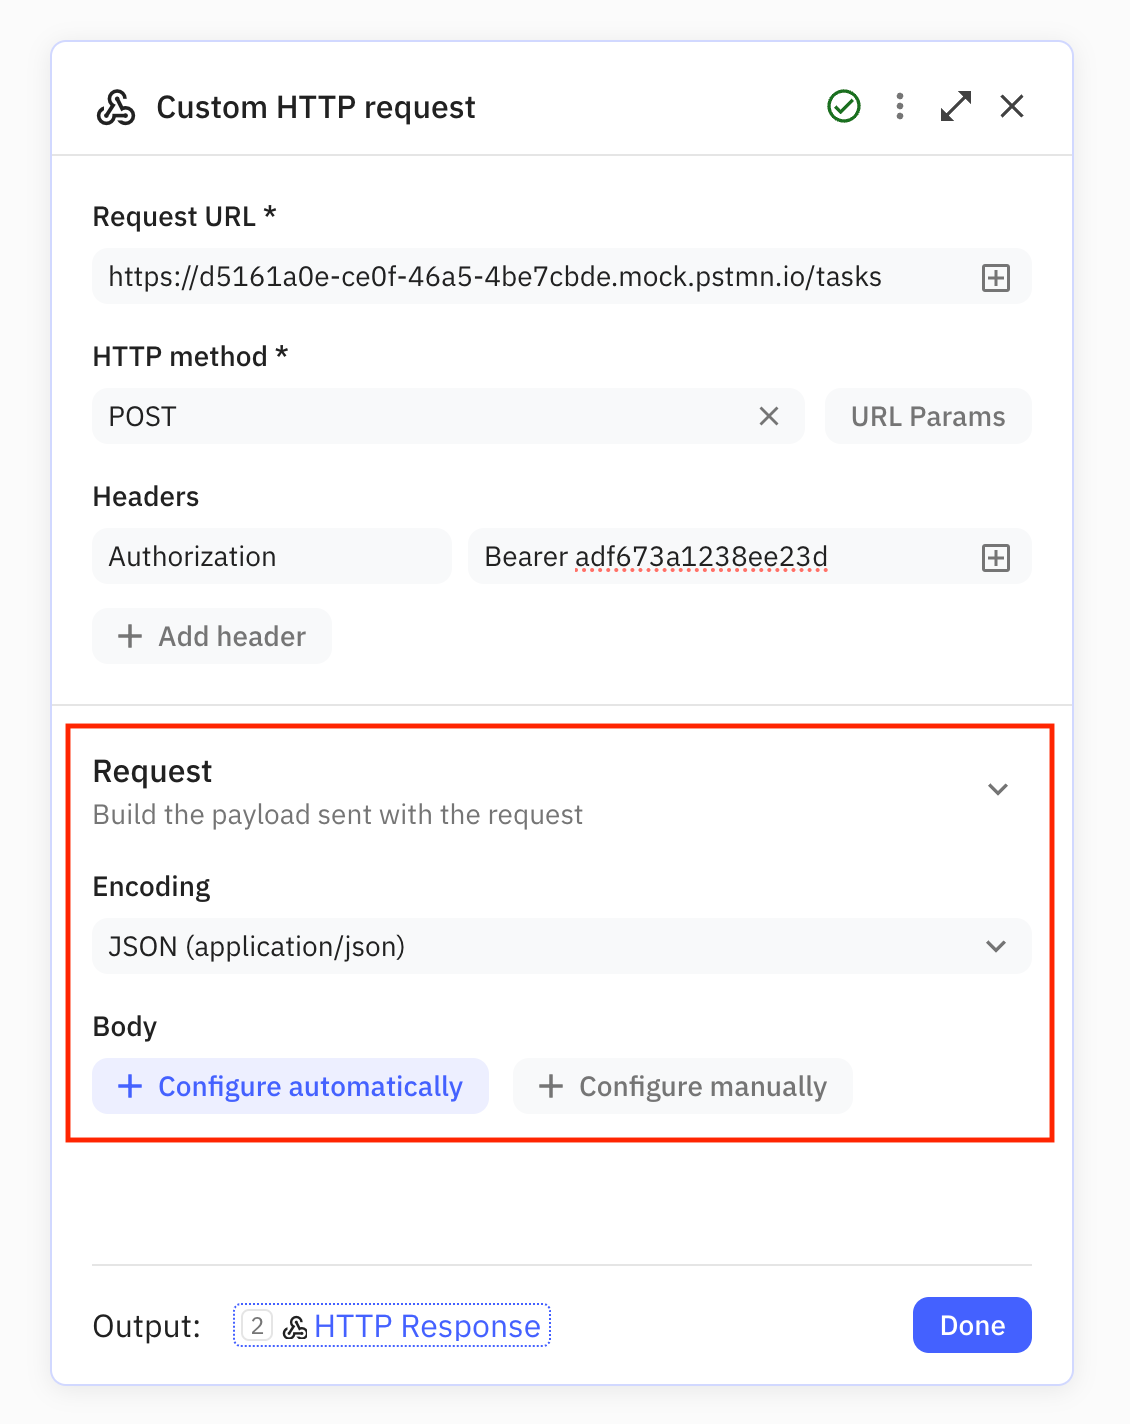
2. Payload configuration
After completing the top-level request configuration, a new section appears to configure the payload that gets sent to the server. In this tutorial, I assume you will send a JSON payload to the API endpoint.
Configuring the JSON structure
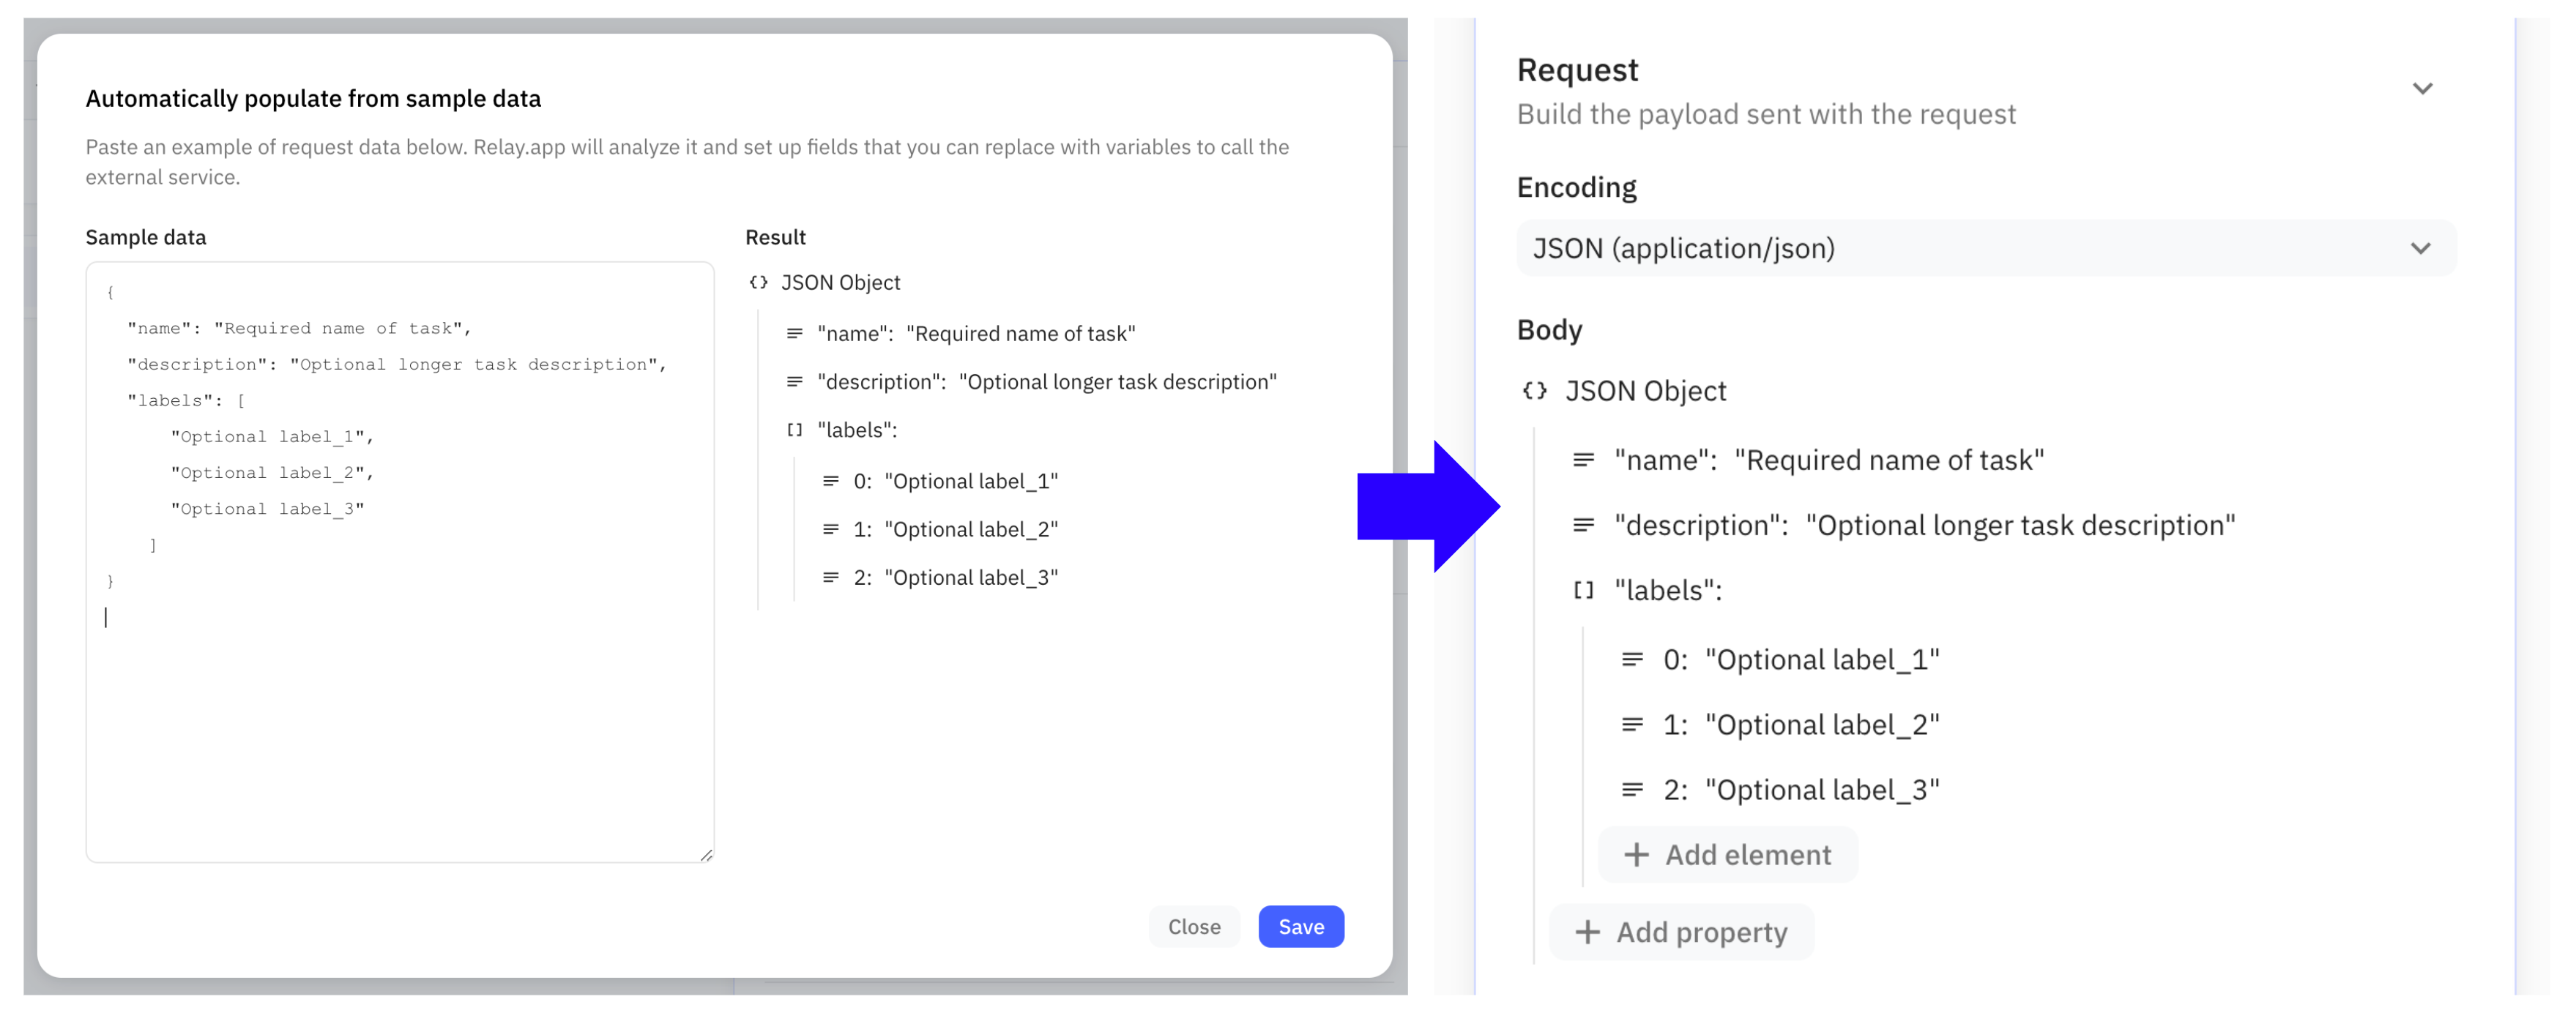
Automatic inference is much less error-prone, so it’s recommended to go ahead with that. After clicking ‘Configure automatically’, a dialog comes up where you can paste the example JSON blob. If the JSON is parsed without errors, Relay.app infers the structure and pre-populates it with the (sample) data in the blob that was pasted.
After saving, it will show up in the step configuration panel in the same way as if it was manually defined.
Populating the JSON payload
Next, you’ll need to populate the payload with the data that needs to be sent to the API endpoint. Practically, this means cleaning up the inferred JSON structure by:
- Removing the static sample data and replacing it with either variable data fields from the workflow or other hardcoded/static data (e.g., for some API endpoints, you might always include the same ‘Project ID’ parameter for all requests)
- Removing optional parameters from the inferred payload structure that you won’t need
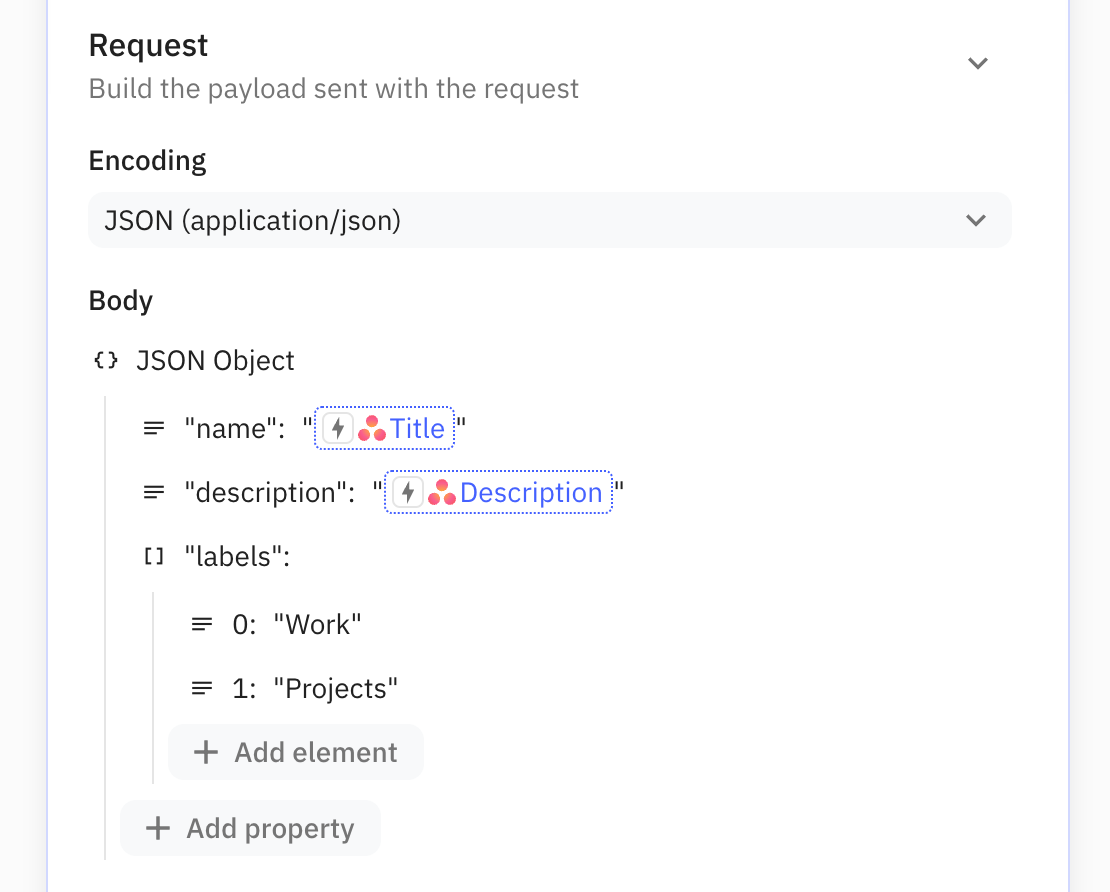
In the screenshot below, you can see how the values of the ‘name’ and ‘description’ string properties have been replaced by data fields coming from an Asana Task (which in this case triggered the workflow). You’ll also notice that the example values in the array of strings named ‘labels’ have been removed, and two new static entries ‘Work’ and ‘Projects’ have been inserted.
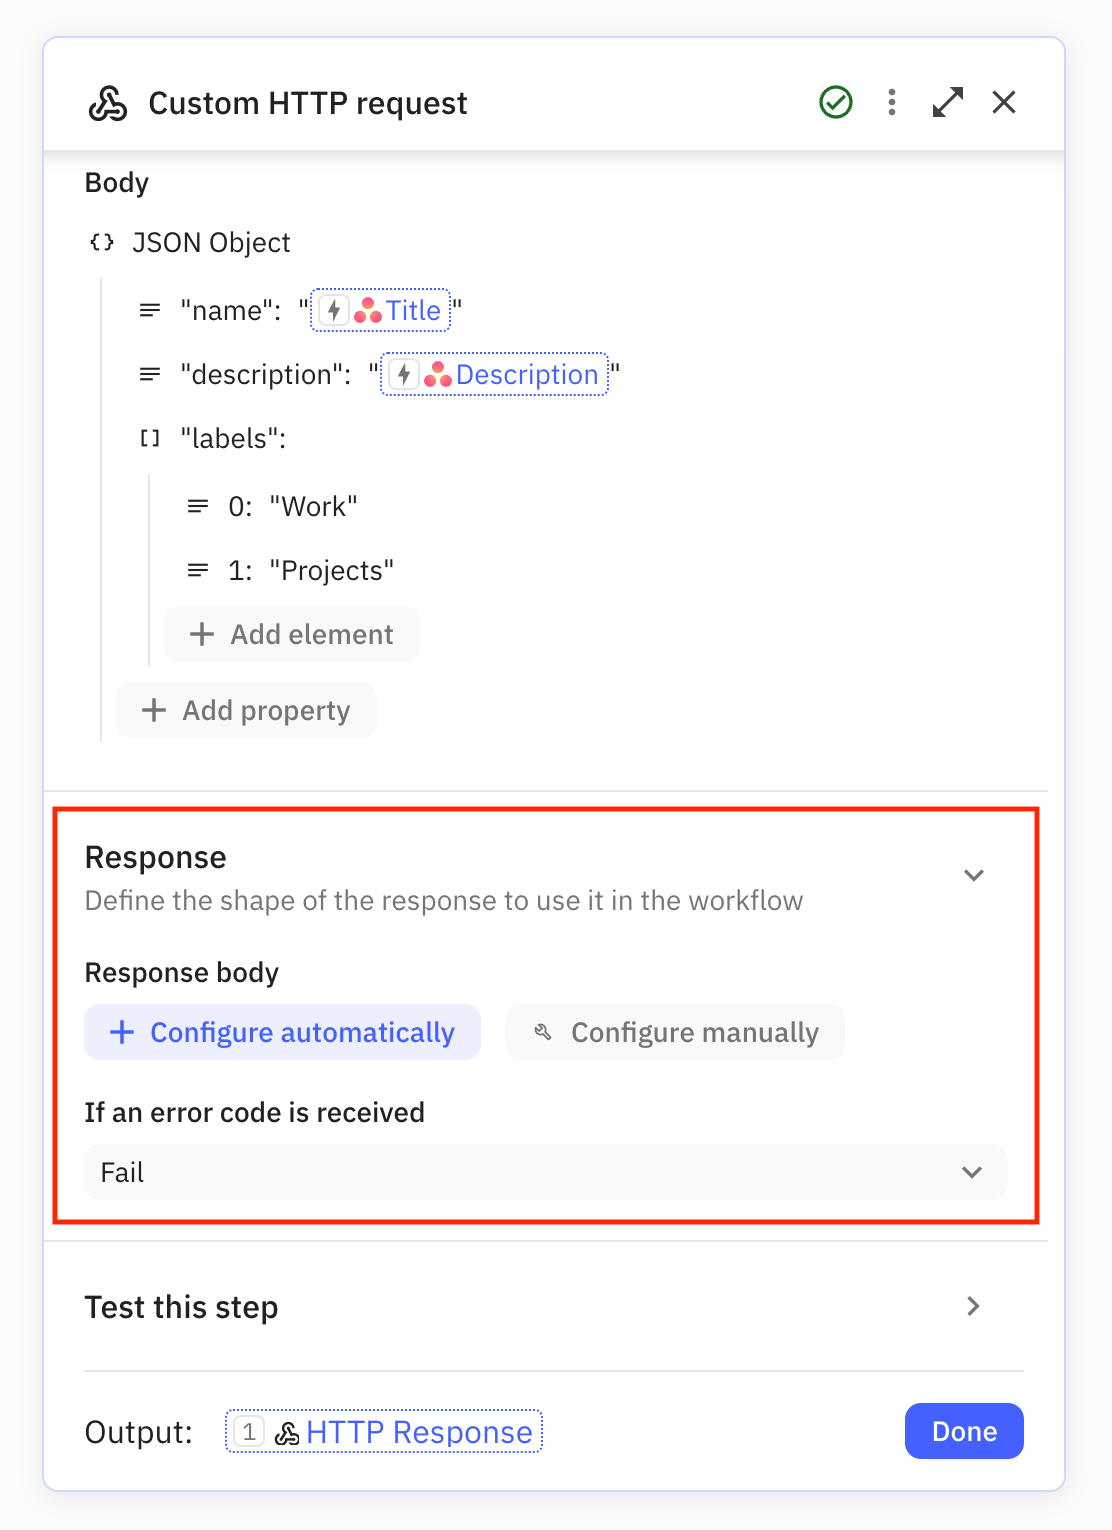
3. Response configuration
Lastly, we can optionally define the structure of the JSON response we expect to get back from the API endpoint so that we can use its values in future steps in our workflow.
Inferring the JSON structure from a test request
Similar to configuring the structure for the request payload, we can either define the response structure manually or infer it automatically. Automatic inference is again recommended.
Automatic inference of the response structure works by making a test request to the server. After clicking ‘Configure automatically,’ a dialog will come up that lets you pick any sample data to use before sending out a test request. After a successful server response is received, its structure can be set as the response structure we expect for all future HTTP requests made via this step.
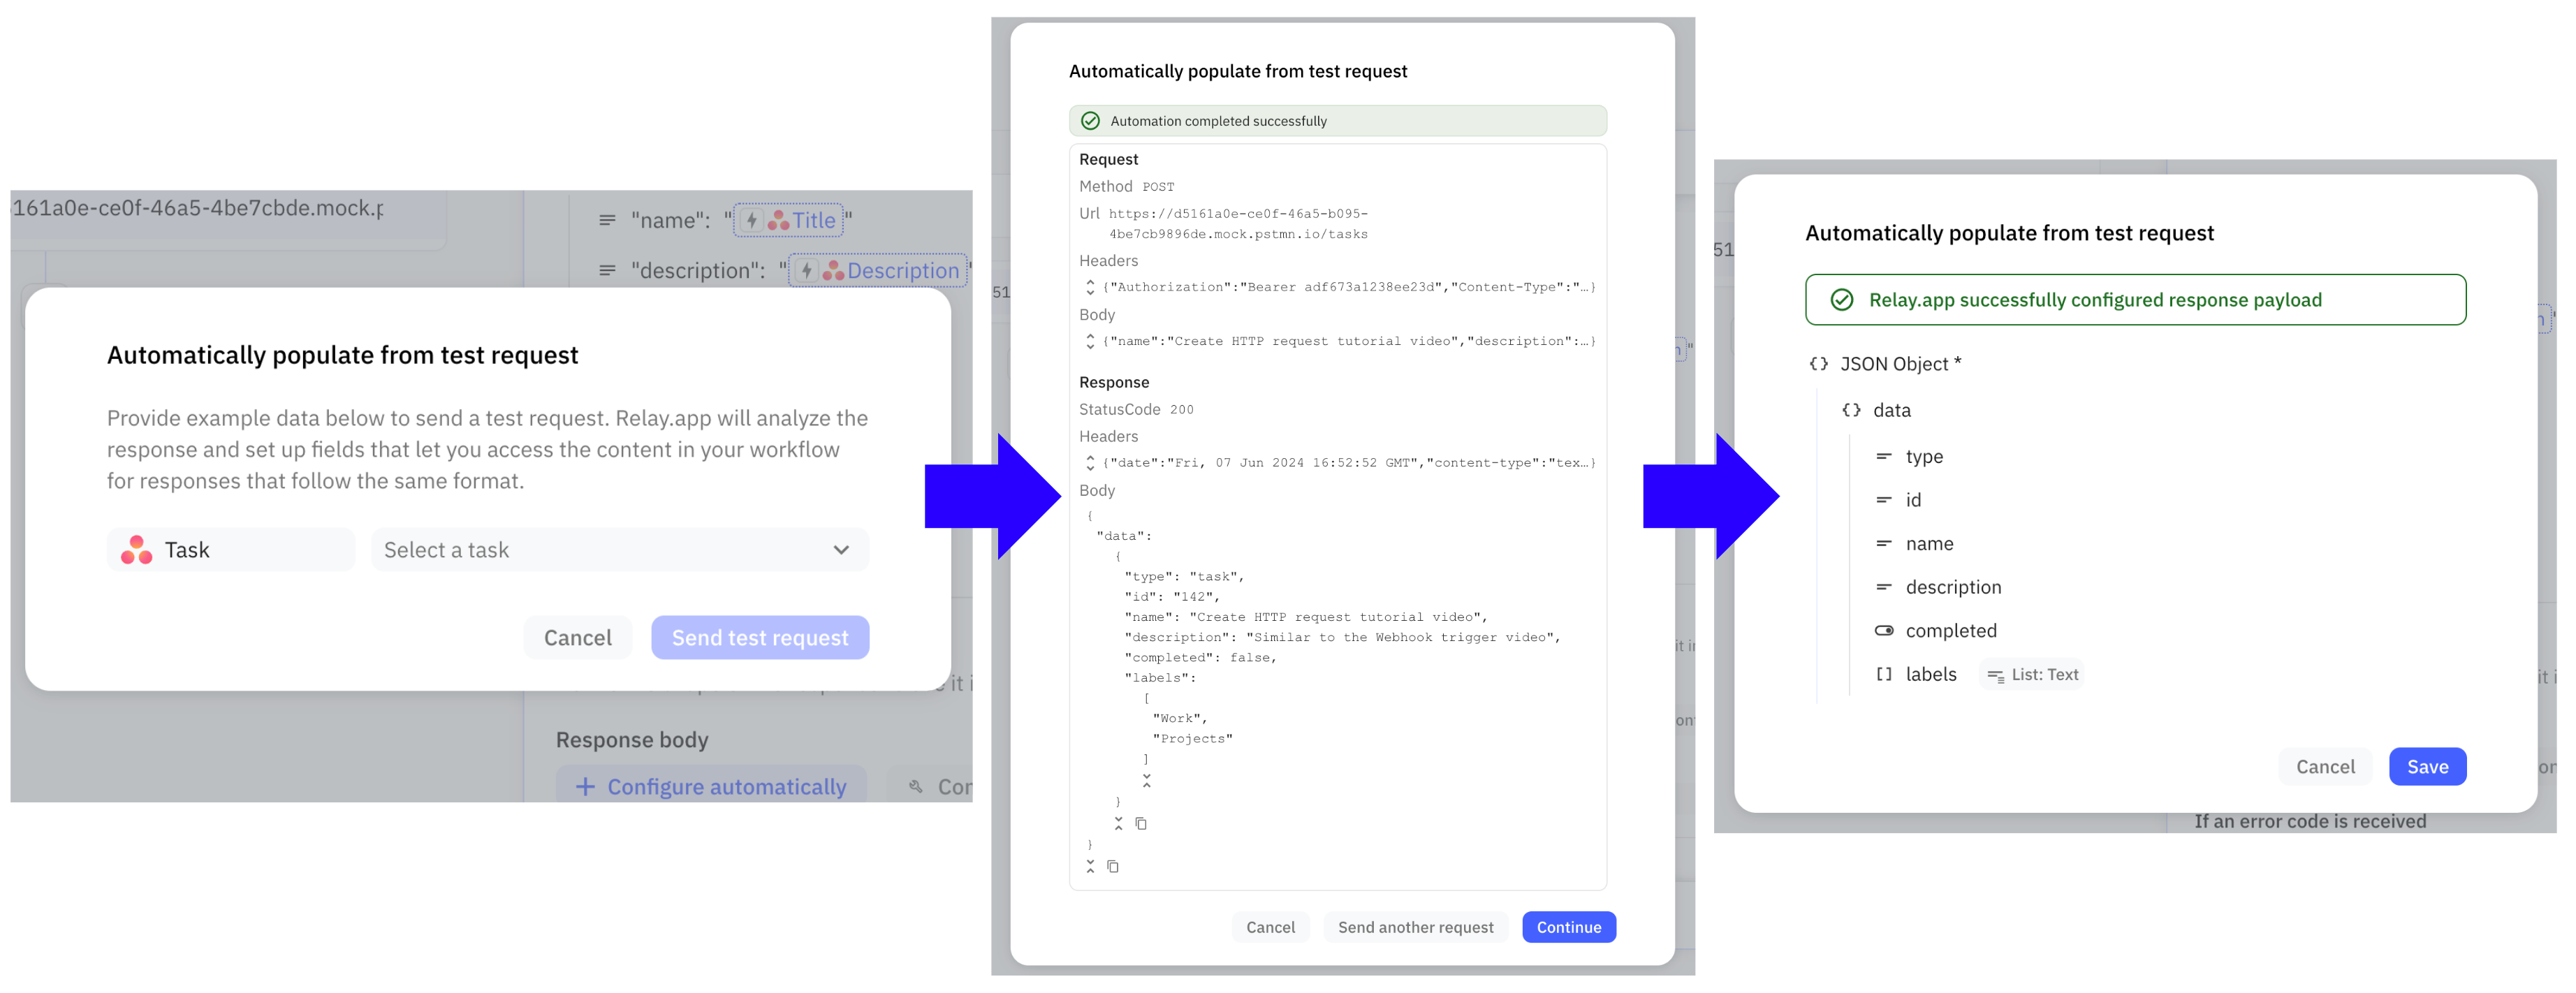
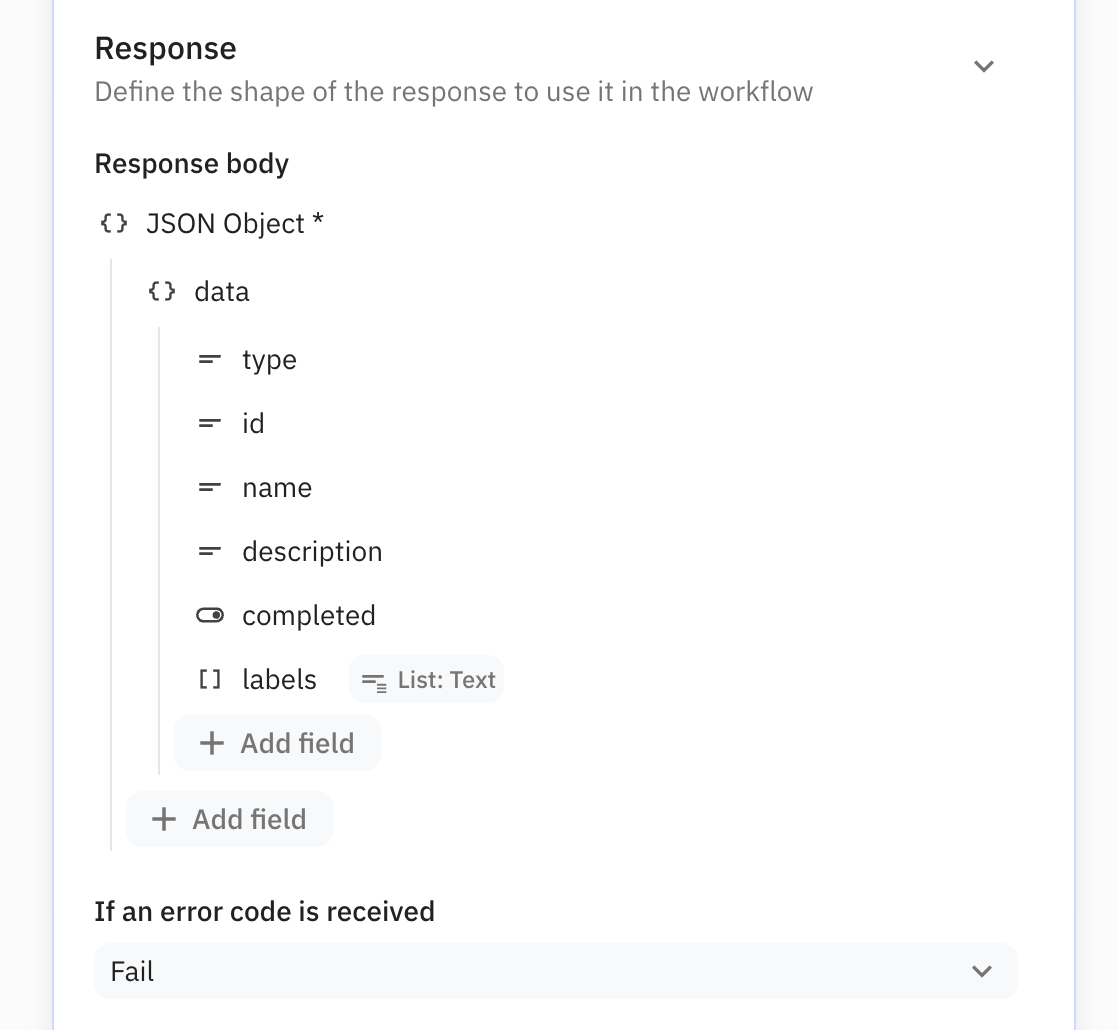
The saved response format will show up as a JSON object structure in the step configuration panel.
Using data from the server response in your workflow
Using data fields from the server response in future steps is easy! They’re accessible via the ‘HTTP Response’ object in the data pickers.


