In this tutorial we'll create a mail merge process based on Gmail and Google Sheets. It will just use a few minutes to set it up!
Let's say you want to send every person that attended our webinar a follow-up email based on a template. Here is how to do that.
1. Prepare your spreadsheet
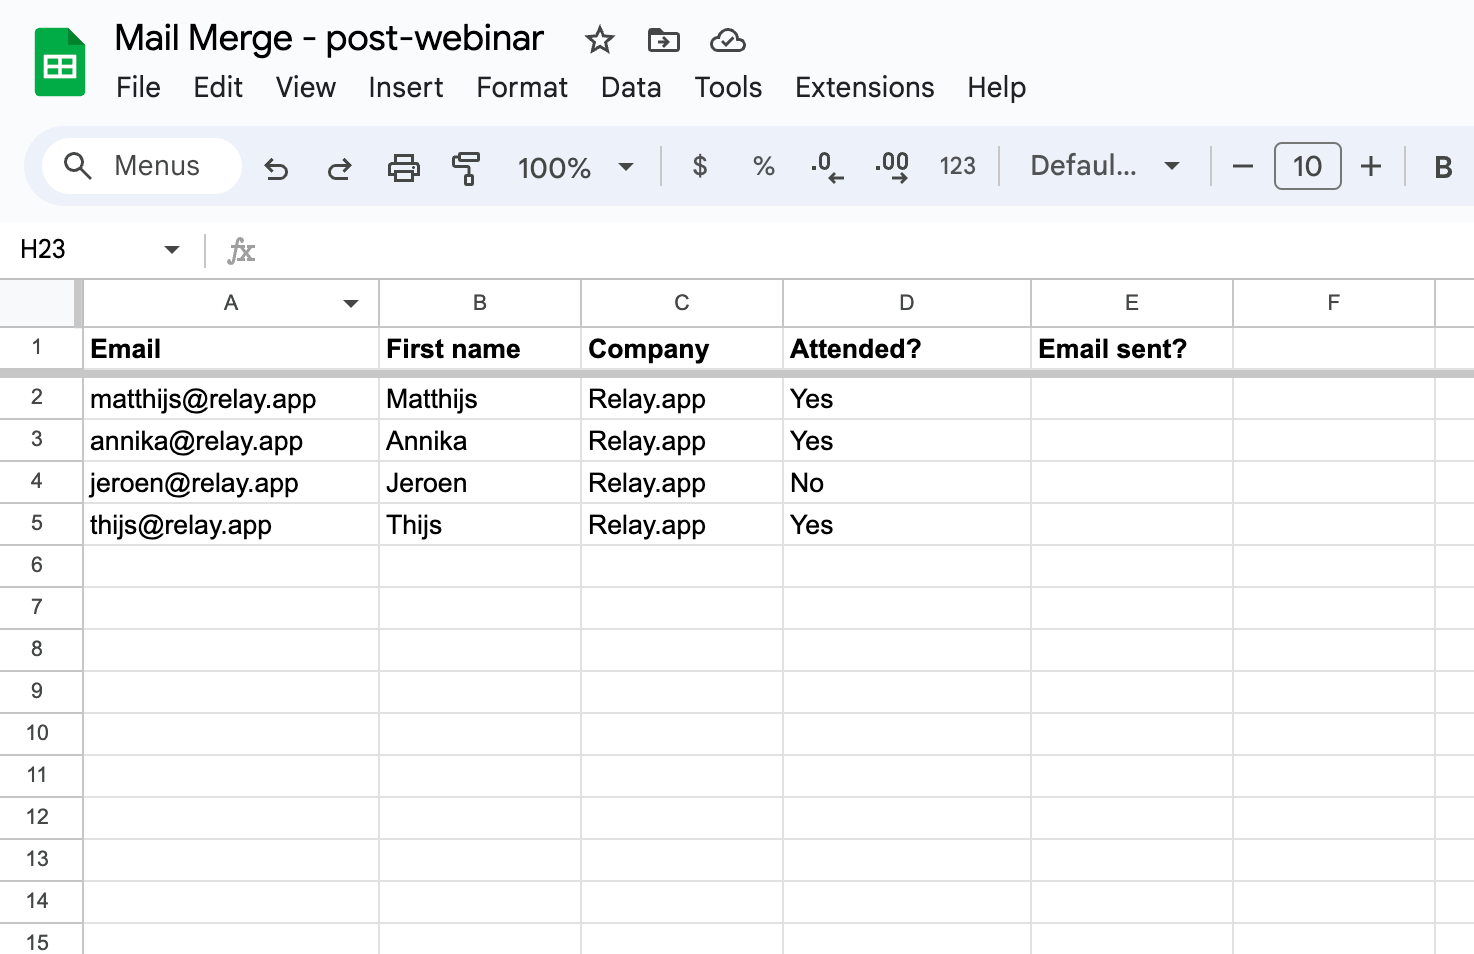
First, create a basic spreadsheet in Google Sheets with one row for every invitee of the webinar. Make sure that your spreadsheet has columns for at least their ‘Email’ address, their ‘First name’, and whether they attended or not. Also add an empty column where we can mark whether we’ve sent them an email. Leave the cells in this column blank.
You may optionally add more columns with variable information that you want to use in the email you’ll be sending to each person. In this example, we’ve added a ‘Company’ column.
Next, create a Playbook in Relay.app with only a couple of steps.
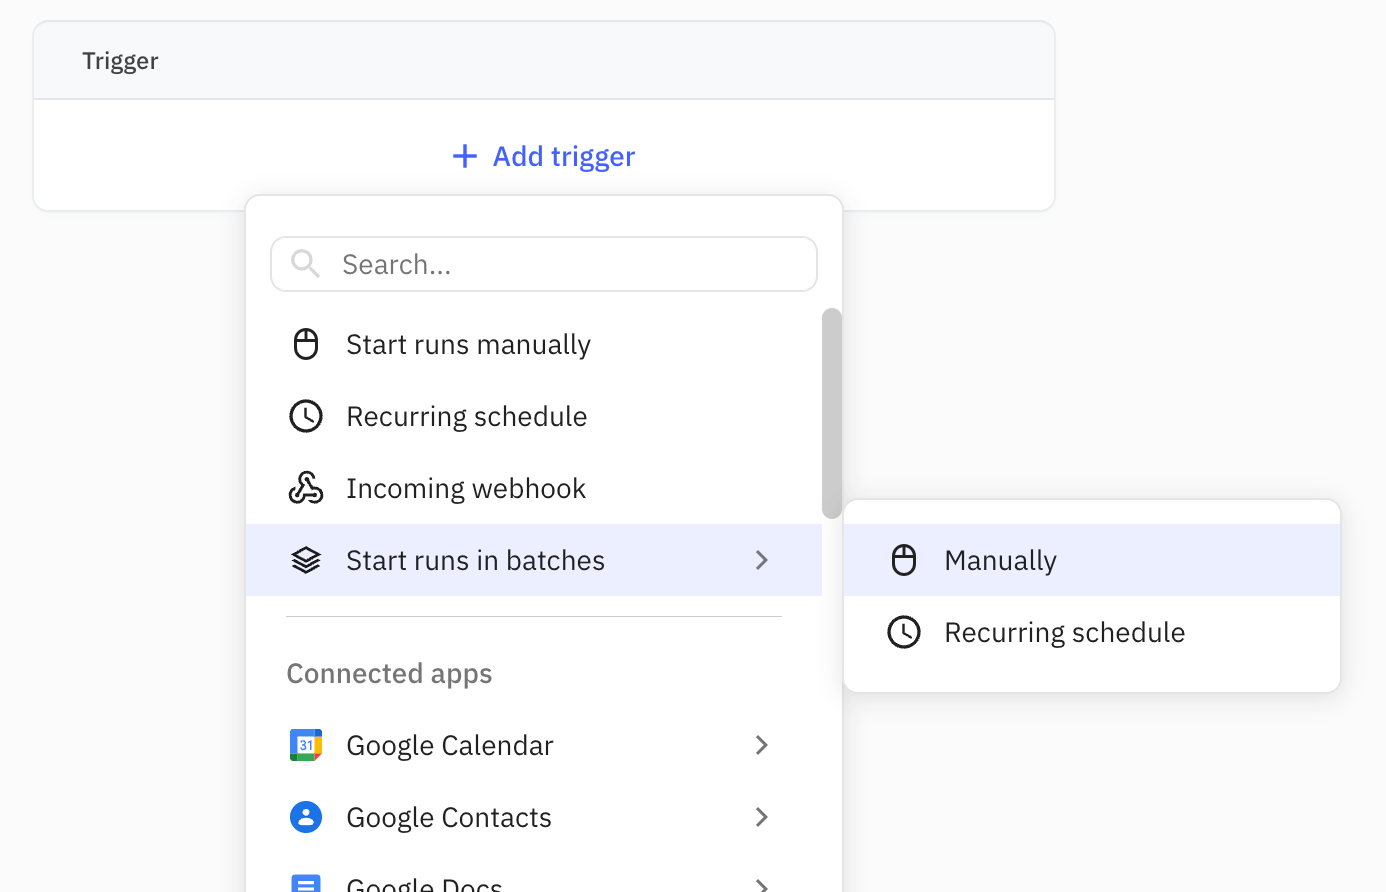
2. Add a manual Batch Trigger
Batch Triggers let you kick off multiple runs of a single workflow at once. We'll use a manual Batch Trigger in our workflow to kick off runs for all rows in the spreadsheet in parallel.
Start by adding the trigger to your workflow.
Configure the trigger by selecting the Spreadsheet you created earlier, and select ‘Only trigger runs for rows that match filters’ in the dropdown.
Now, configure two filters:
- The first on the ‘Attended?’ column, to only pass rows where the value of that cell is exactly ‘Yes’
- The second on the ‘Email sent?’ column, to only pass rows where the value is not ‘Yes’
The latter filter is to avoid that we’re sending folks an email twice.
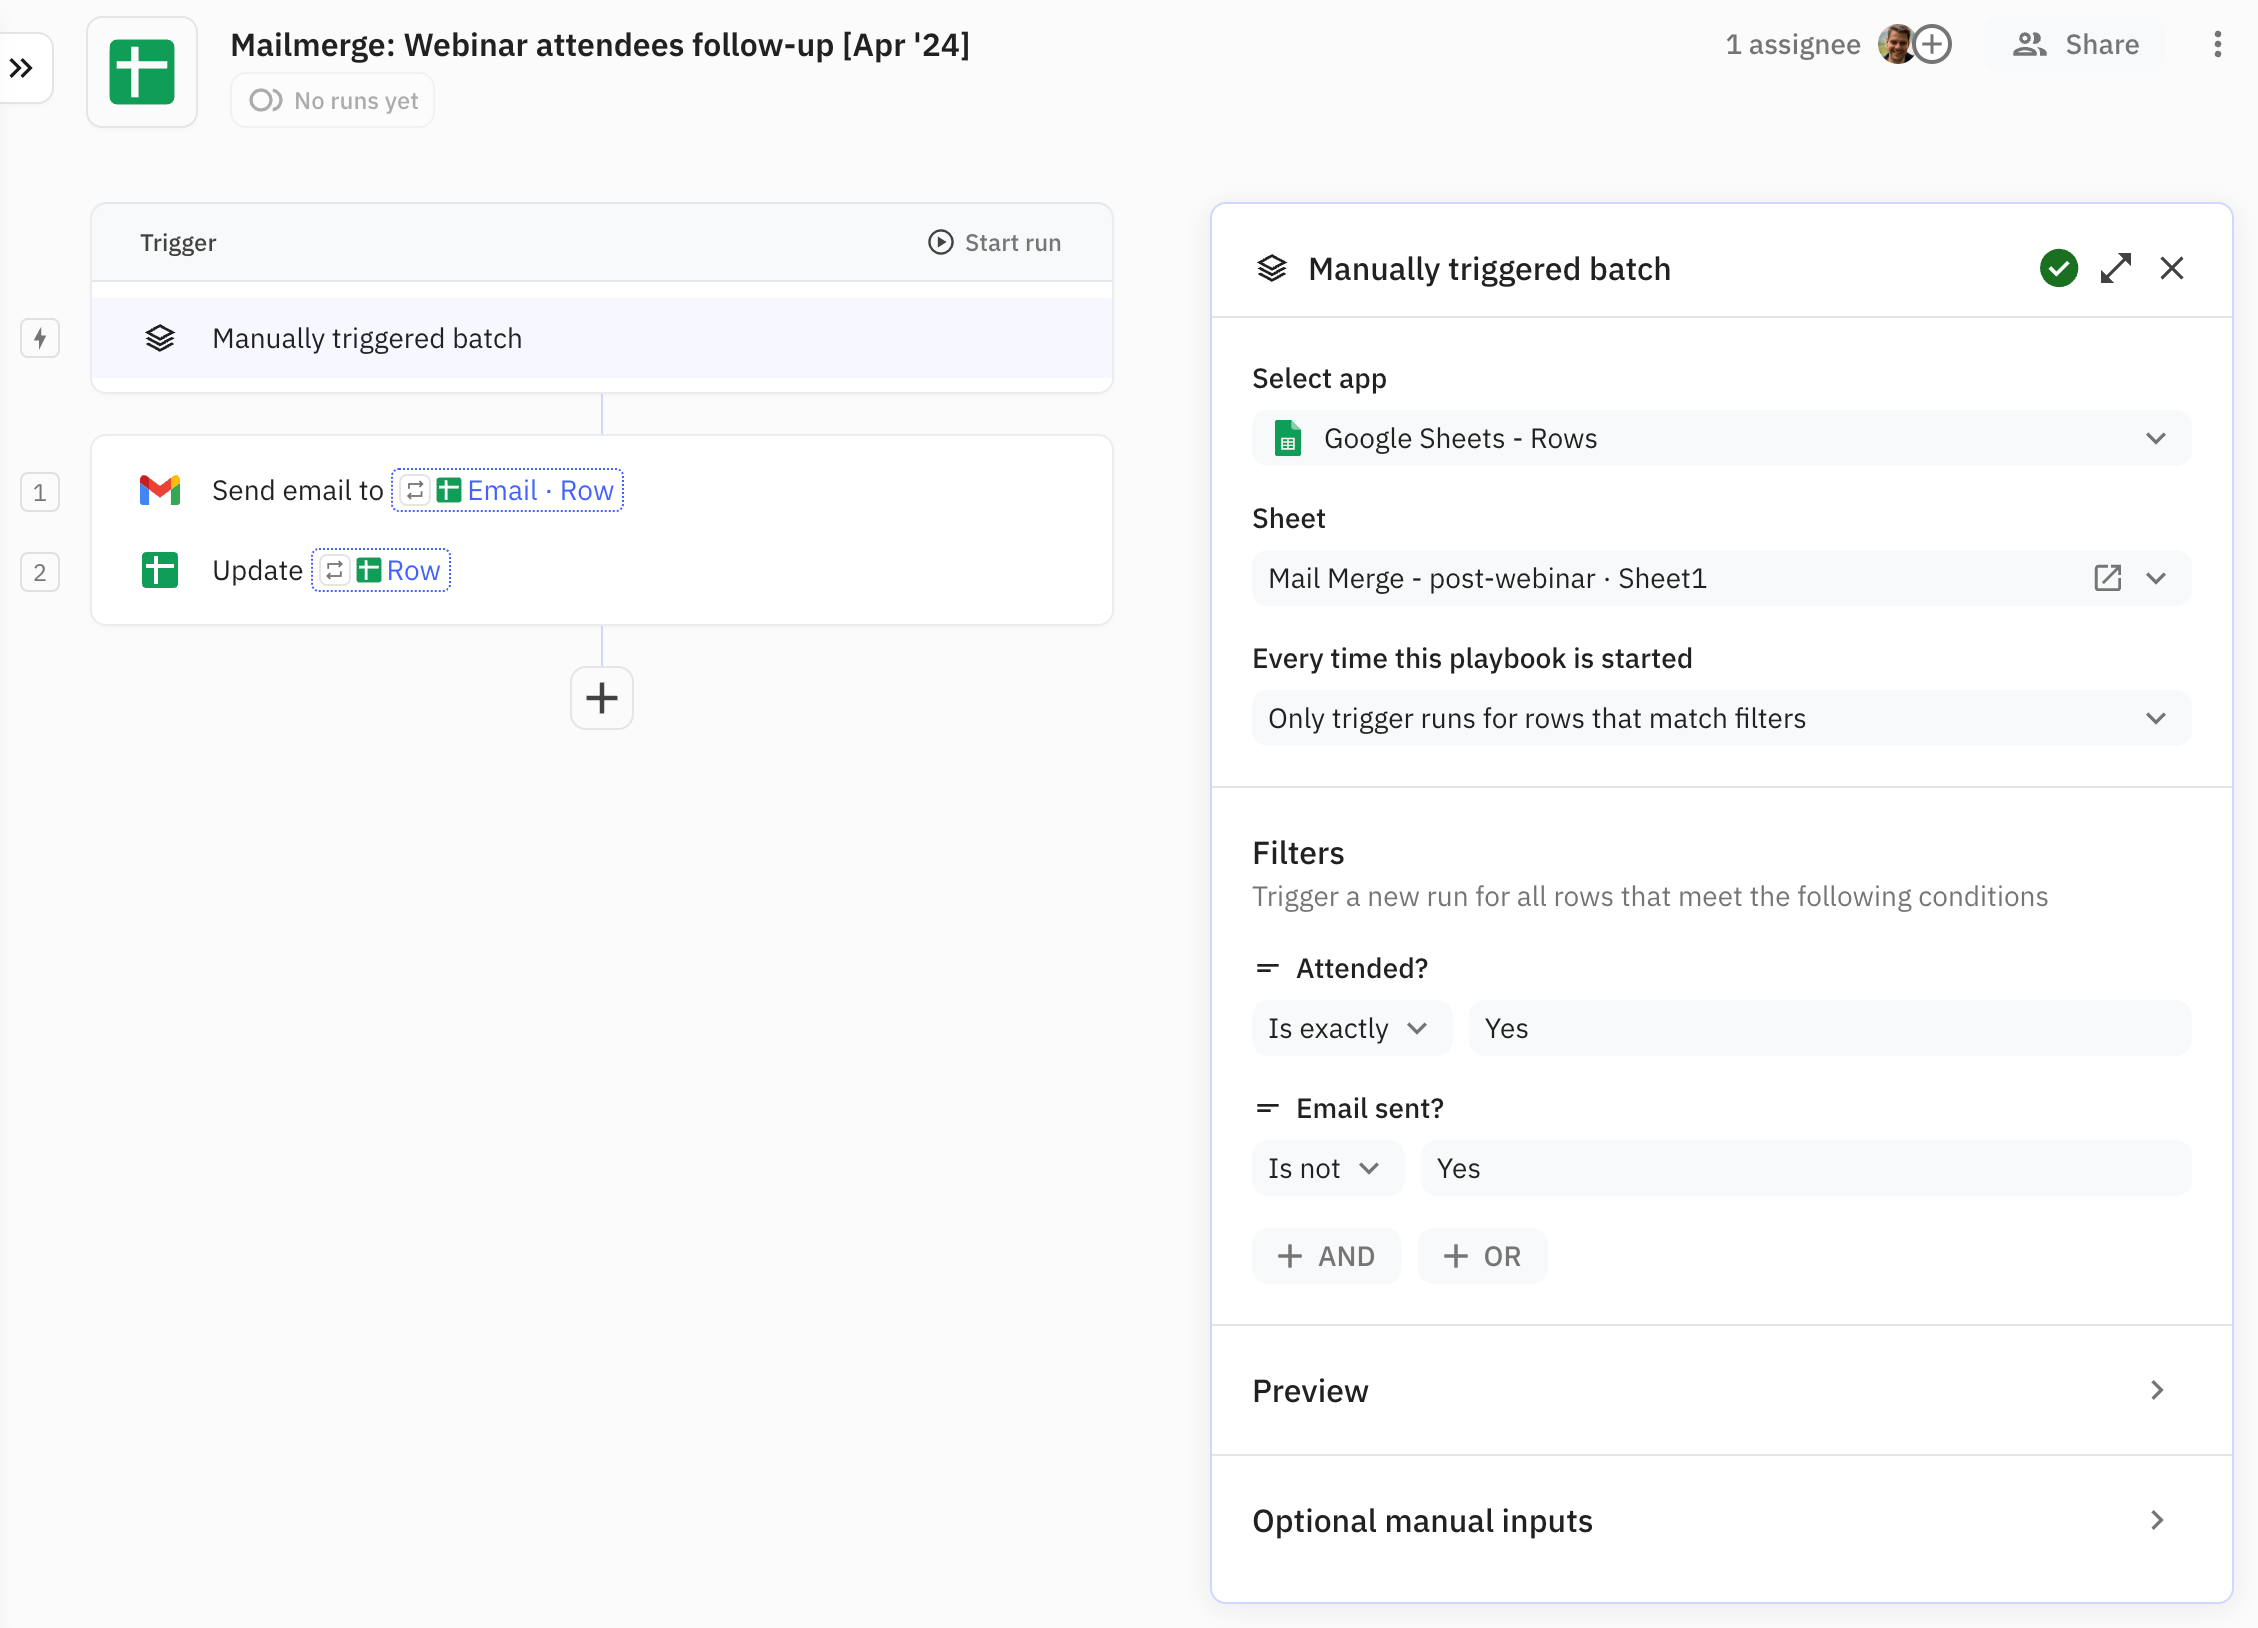
3. Add a ‘Gmail - Send email’ step
Next, set up a Gmail action to send an email. Select the ‘Email’ column from the spreadsheet row as the recipient of the email, and use the other columns to personalize the message template in the Body section.
Pro-tip: did you know you can use the ‘@’ key on the keyboard to get in-line access to the variable/field picker in Relay.app?

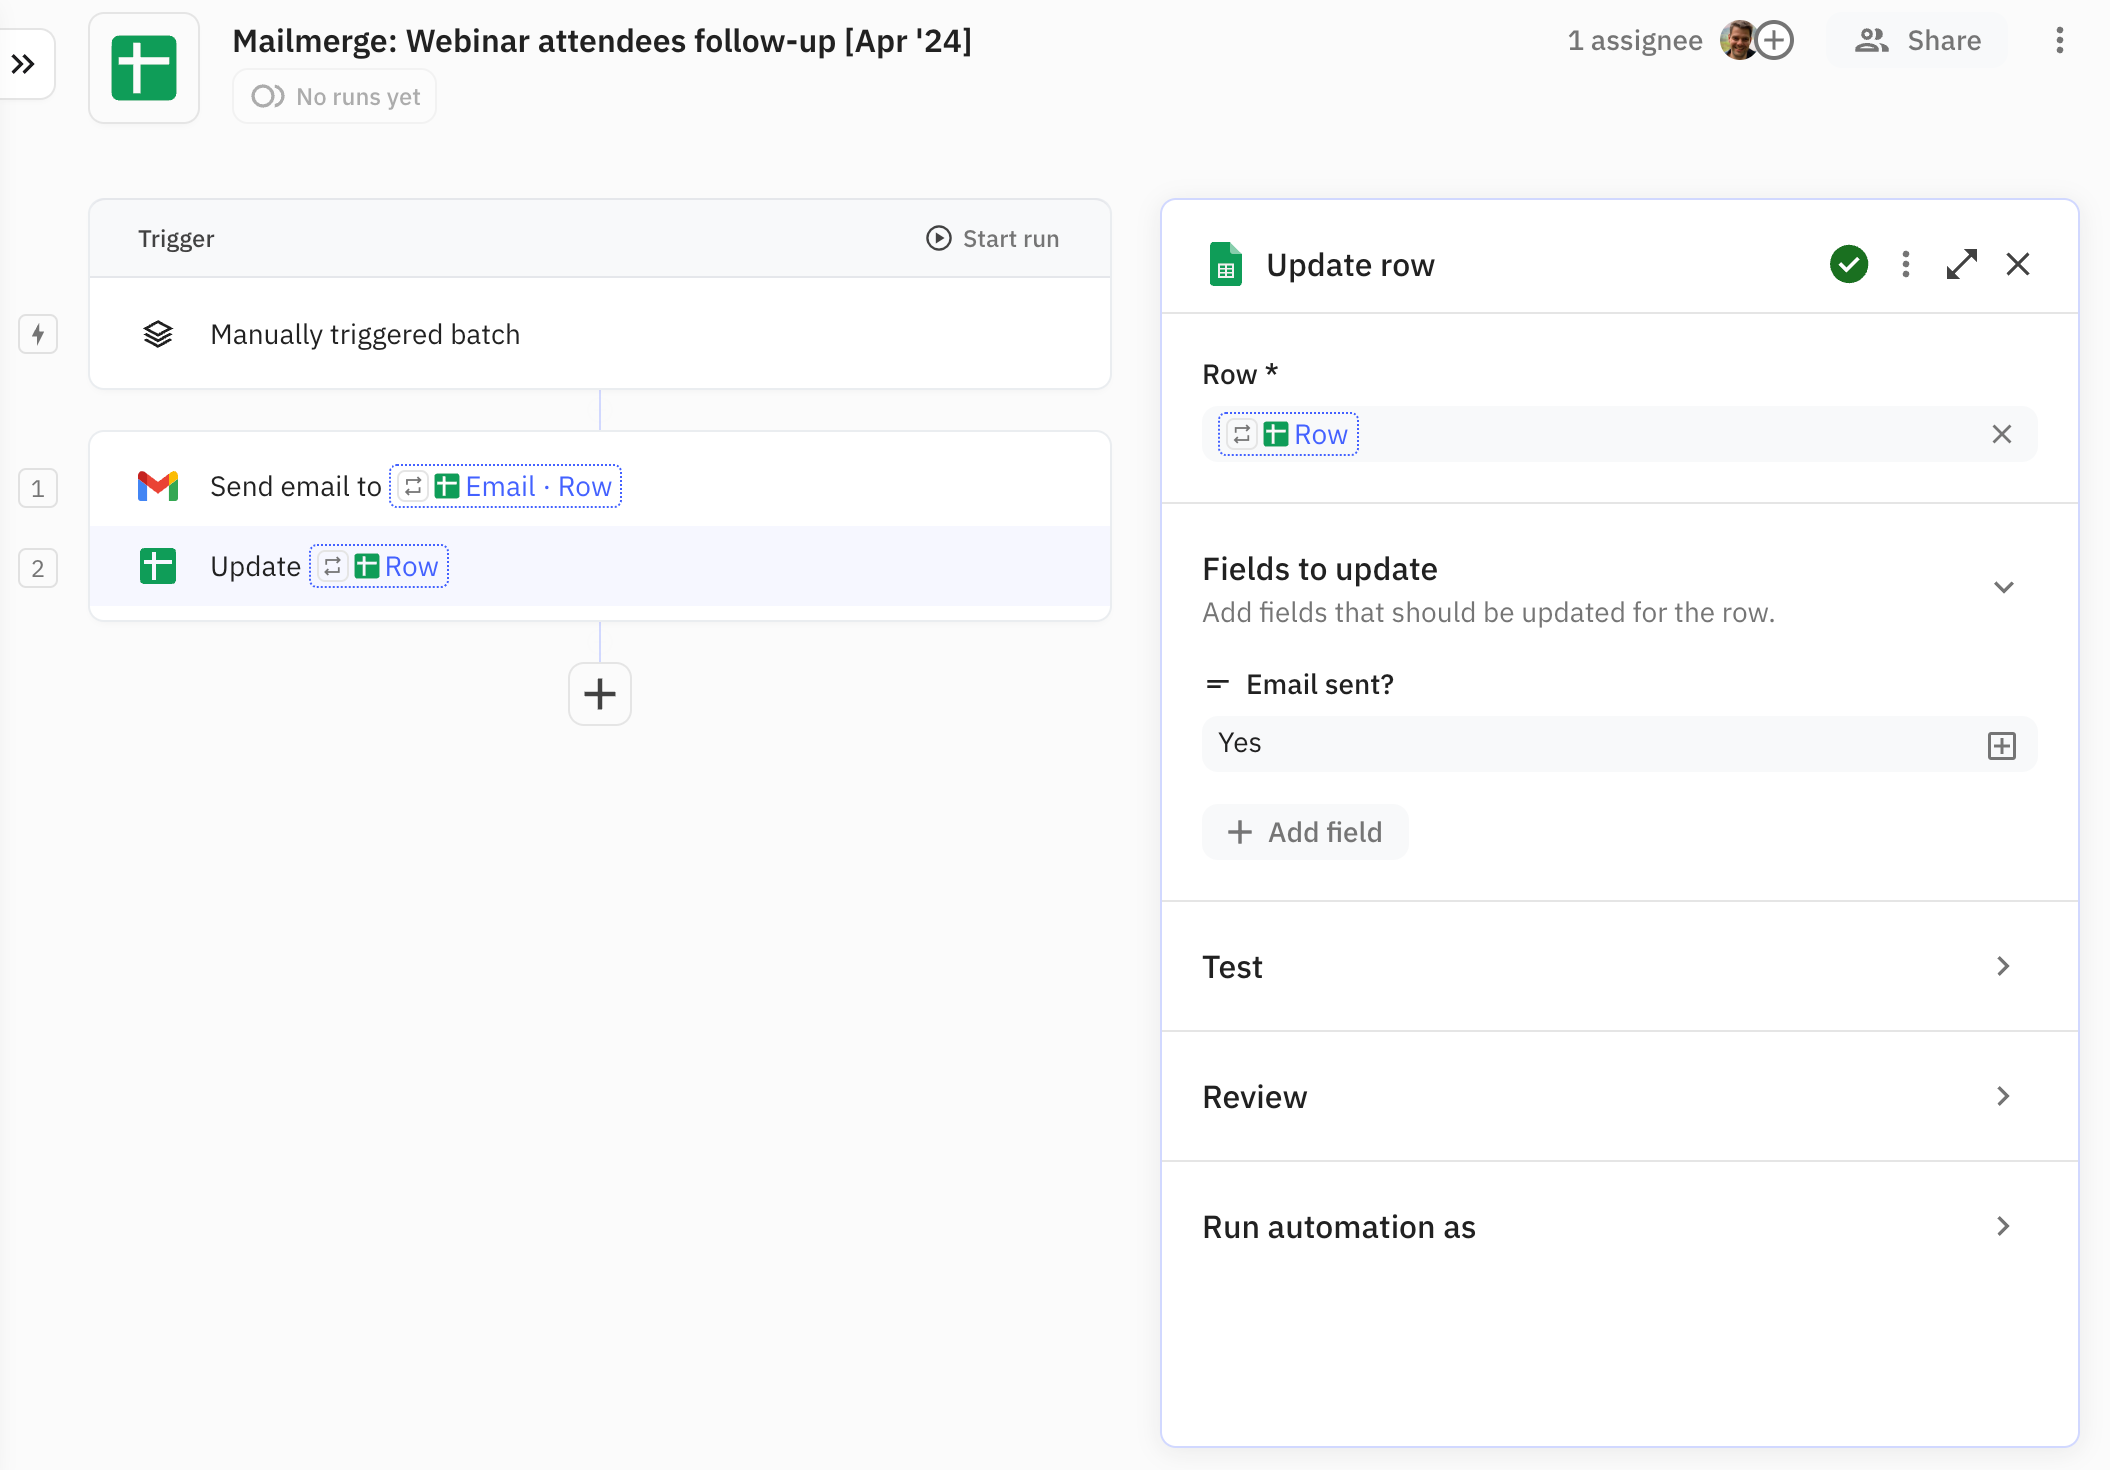
4. Add a ‘Google Sheets - Update row’ step
Finally, add a step to update the row that triggered this run. Specifically, you’ll want to update the value of the cell in the ‘Email sent?’ column and set it to ‘Yes’.
This will allow you to track who received the follow-up email.
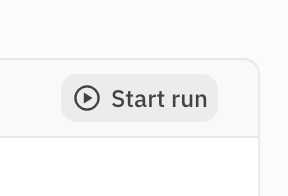
That’s it! All you need to do is kick off the mail merge by clicking the ‘Start run’ button in the Trigger header.