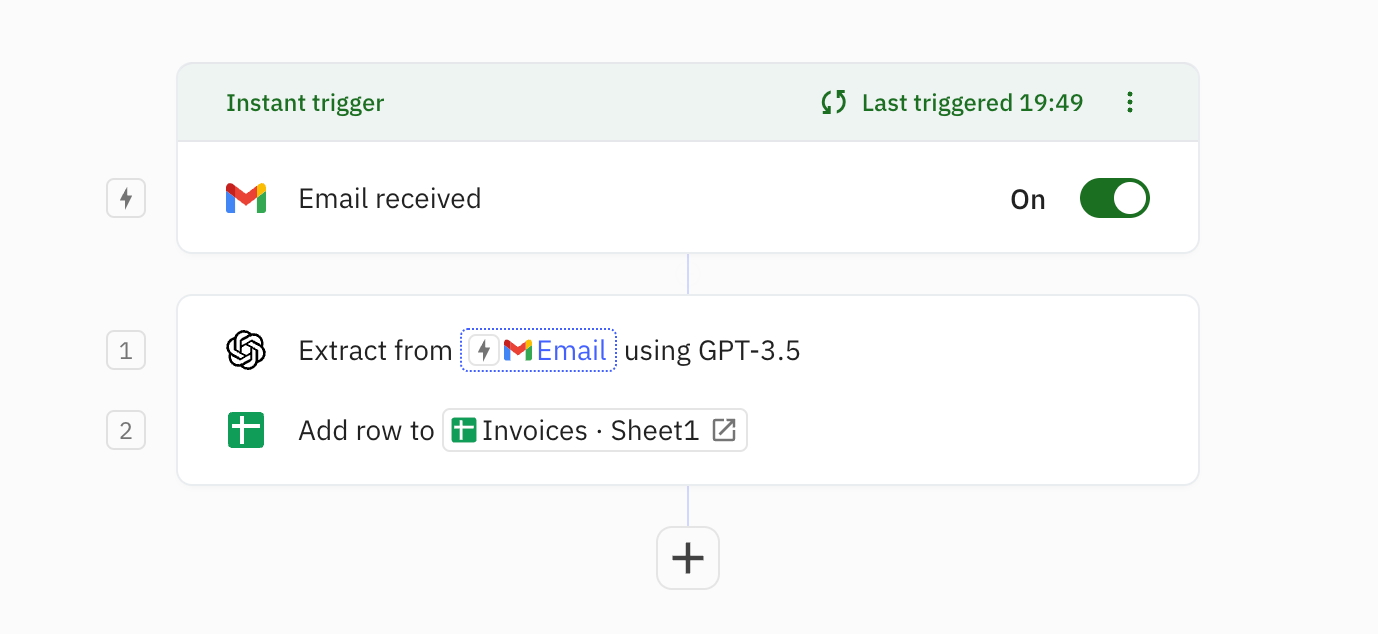
AI steps in Relay.app let you harness the power of LLMs like GPT, Gemini, Claude, or LLaMA within your workflows. This tutorial explains how to extract structured information from invoice emails and add that to a spreadsheet.
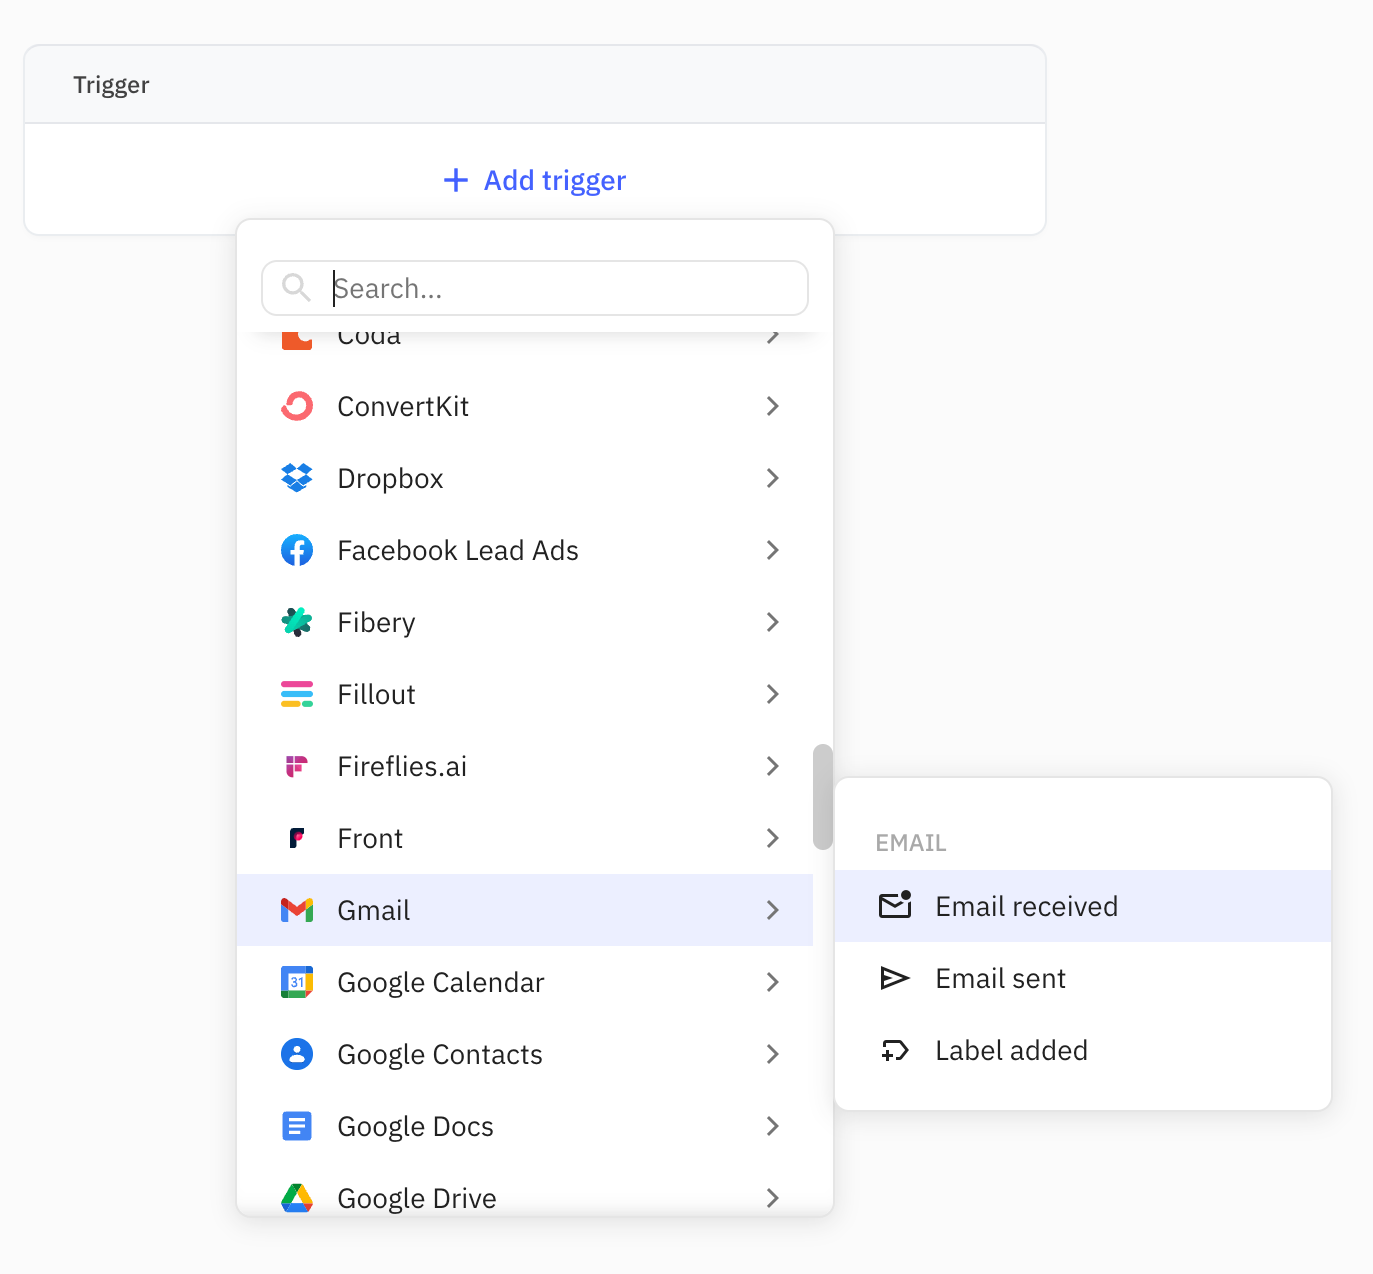
1. Set up an ‘Email Received’ trigger
First, set up an ‘Email Received’ trigger for Gmail or Outlook, depending on where you receive your invoice emails.
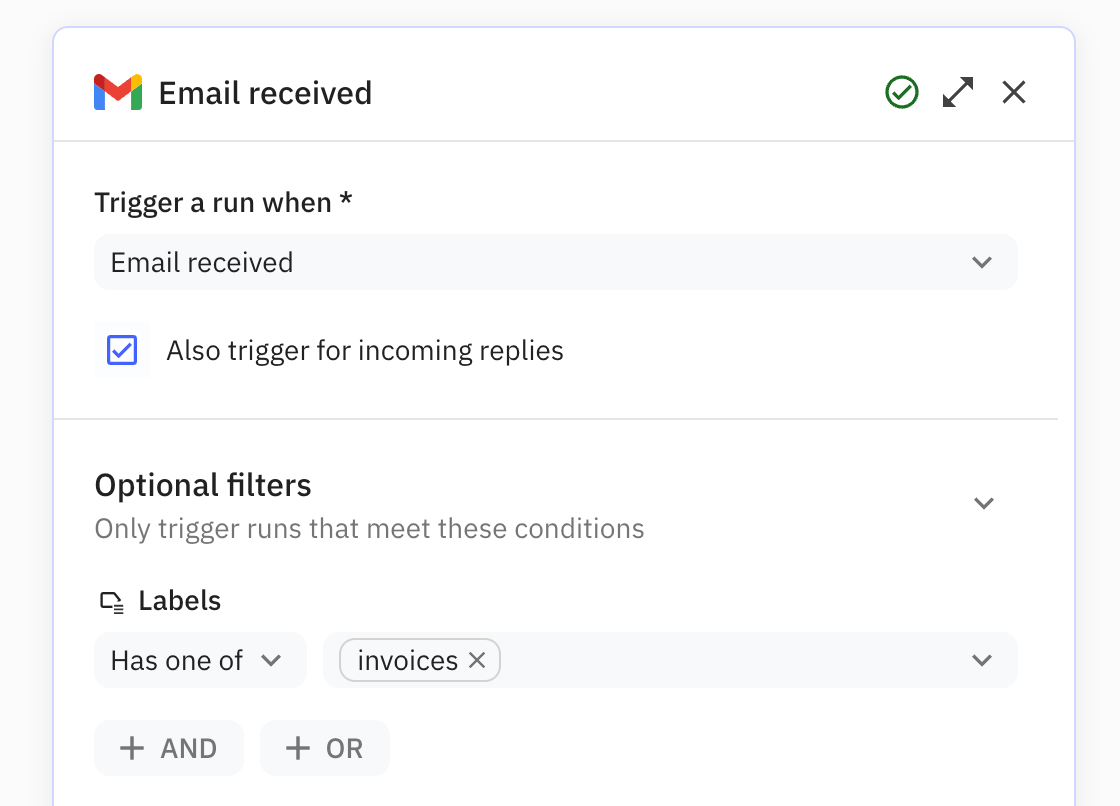
Since we only want to run this workflow for emails containing an invoice, you’ll need to add one or more filters to the trigger. For example, add a filter for the message body containing the word “invoice” or based on the presence of an “invoices” label.
After configuring the filters, the ‘Preview’ section in the trigger panel will show a few recent emails that match the filters above.
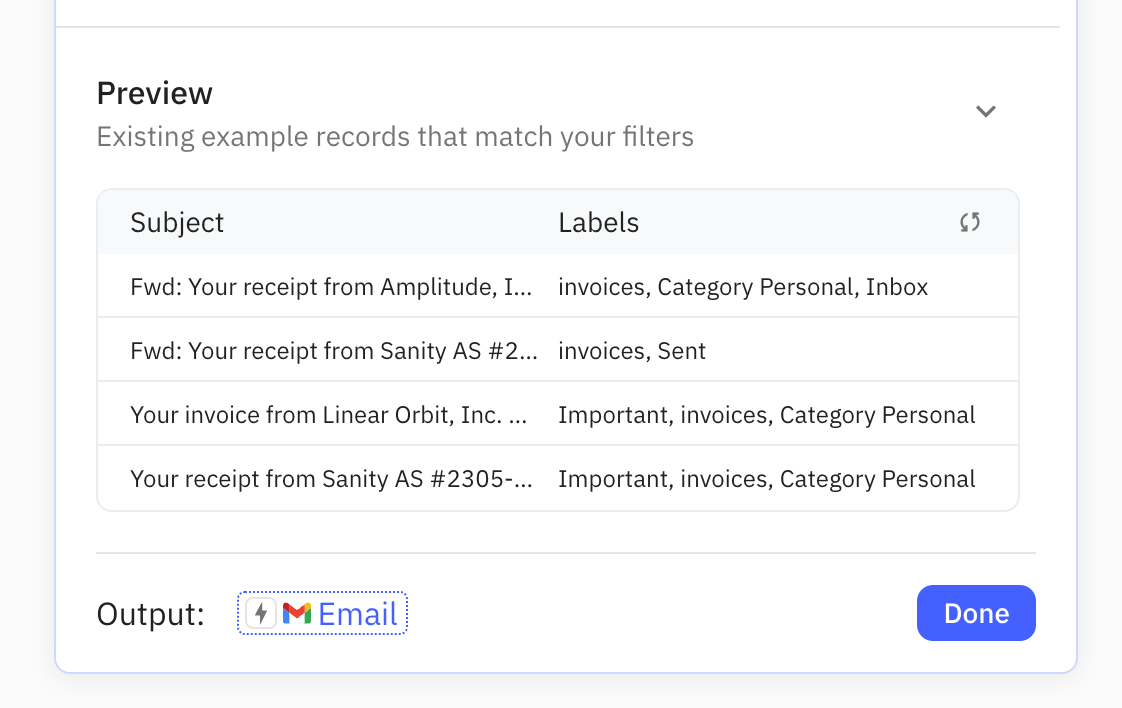
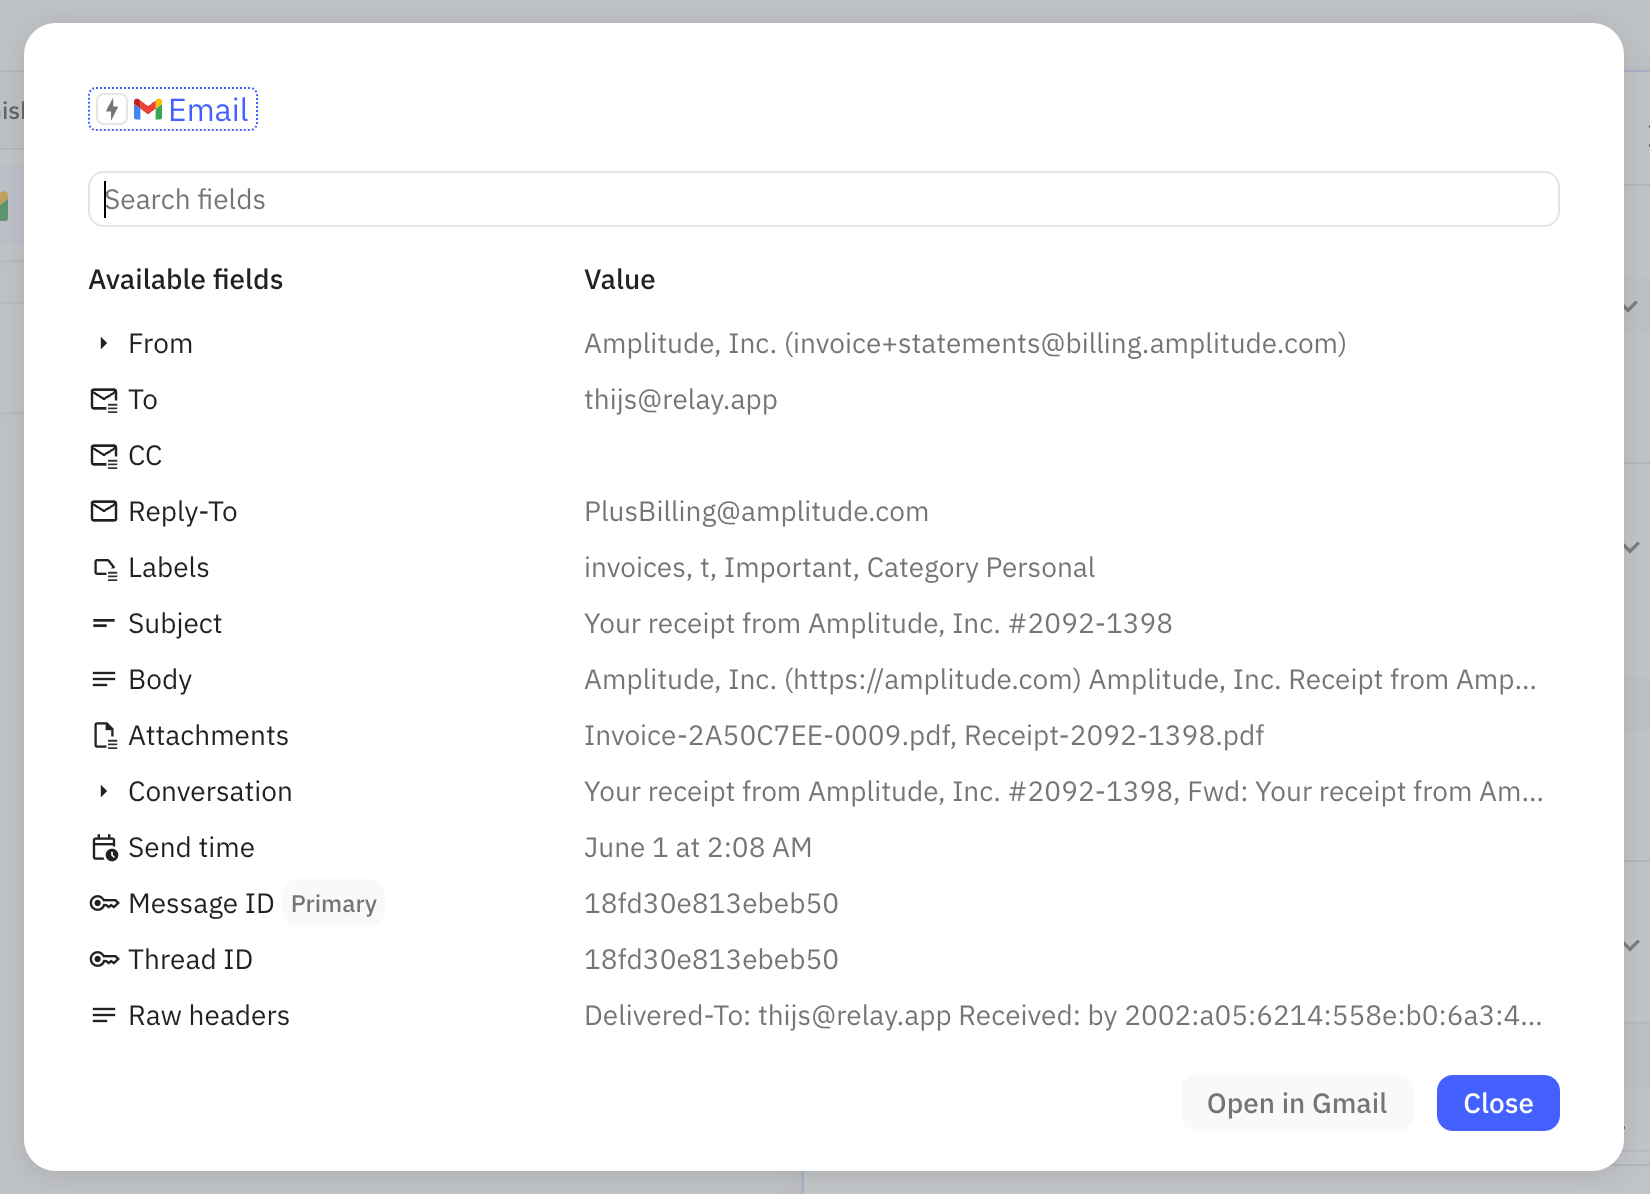
Clicking on an email will open an object inspector dialog showing all the email fields that will be accessible in the remainder of the playbook, as well as the value of each field for the preview email you clicked on. There’s also an ‘Open in Gmail’ button that lets you open the email in Gmail.
2. Configure an ‘AI Extract’ step
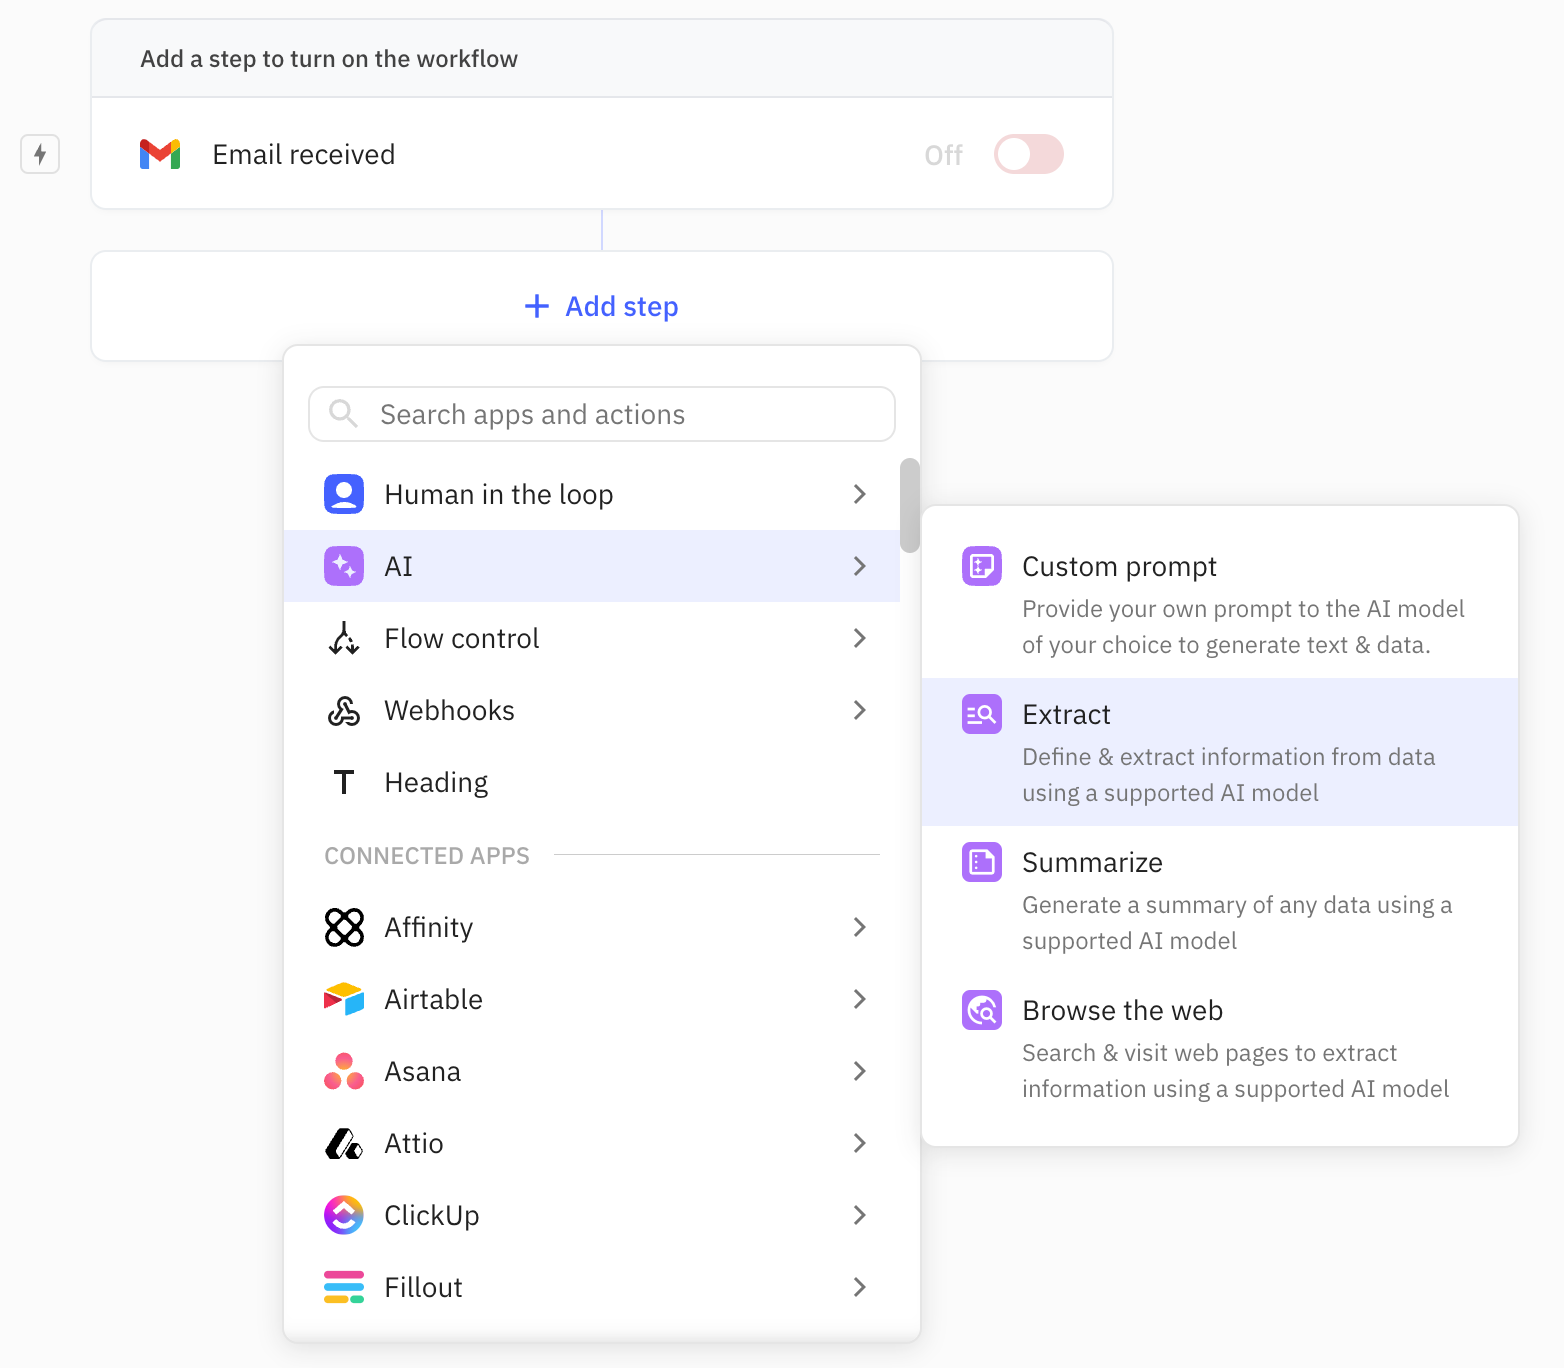
After setting up the trigger, add an ‘AI Extract’ step to the workflow. This step makes it very easy to extract information from any resource, such as an email or a document.
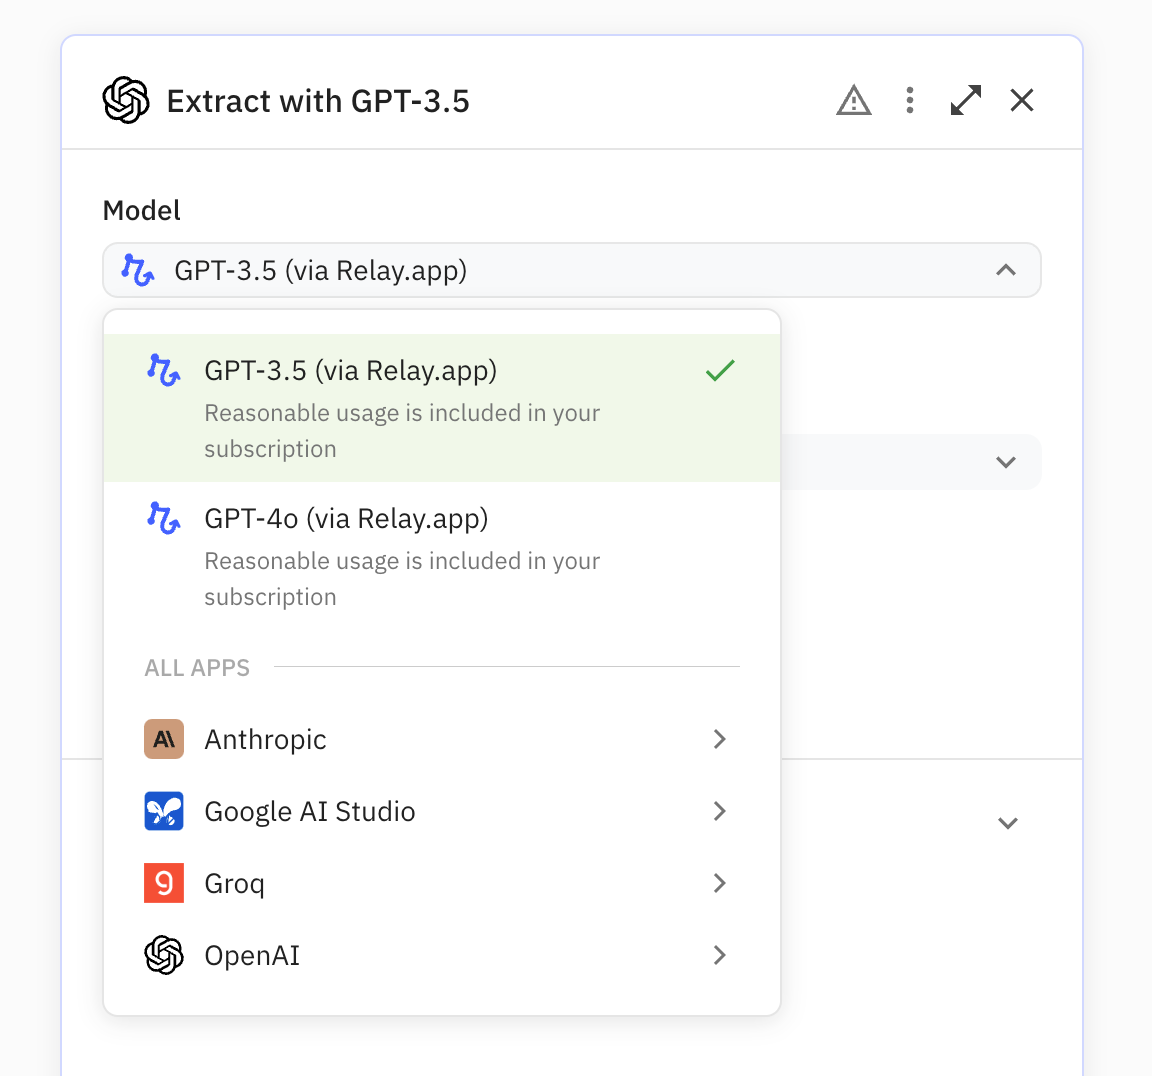
Select an AI model
The first thing to decide is which AI model to use. Free reasonable use of both GPT-3.5 and GPT-4 is included in all Relay.app plans, including our free plan. You may also use any other model by signing in with your own account with the model provider. In our experience, GPT, Claude 3, and Gemini 1.5 models work best for extraction.
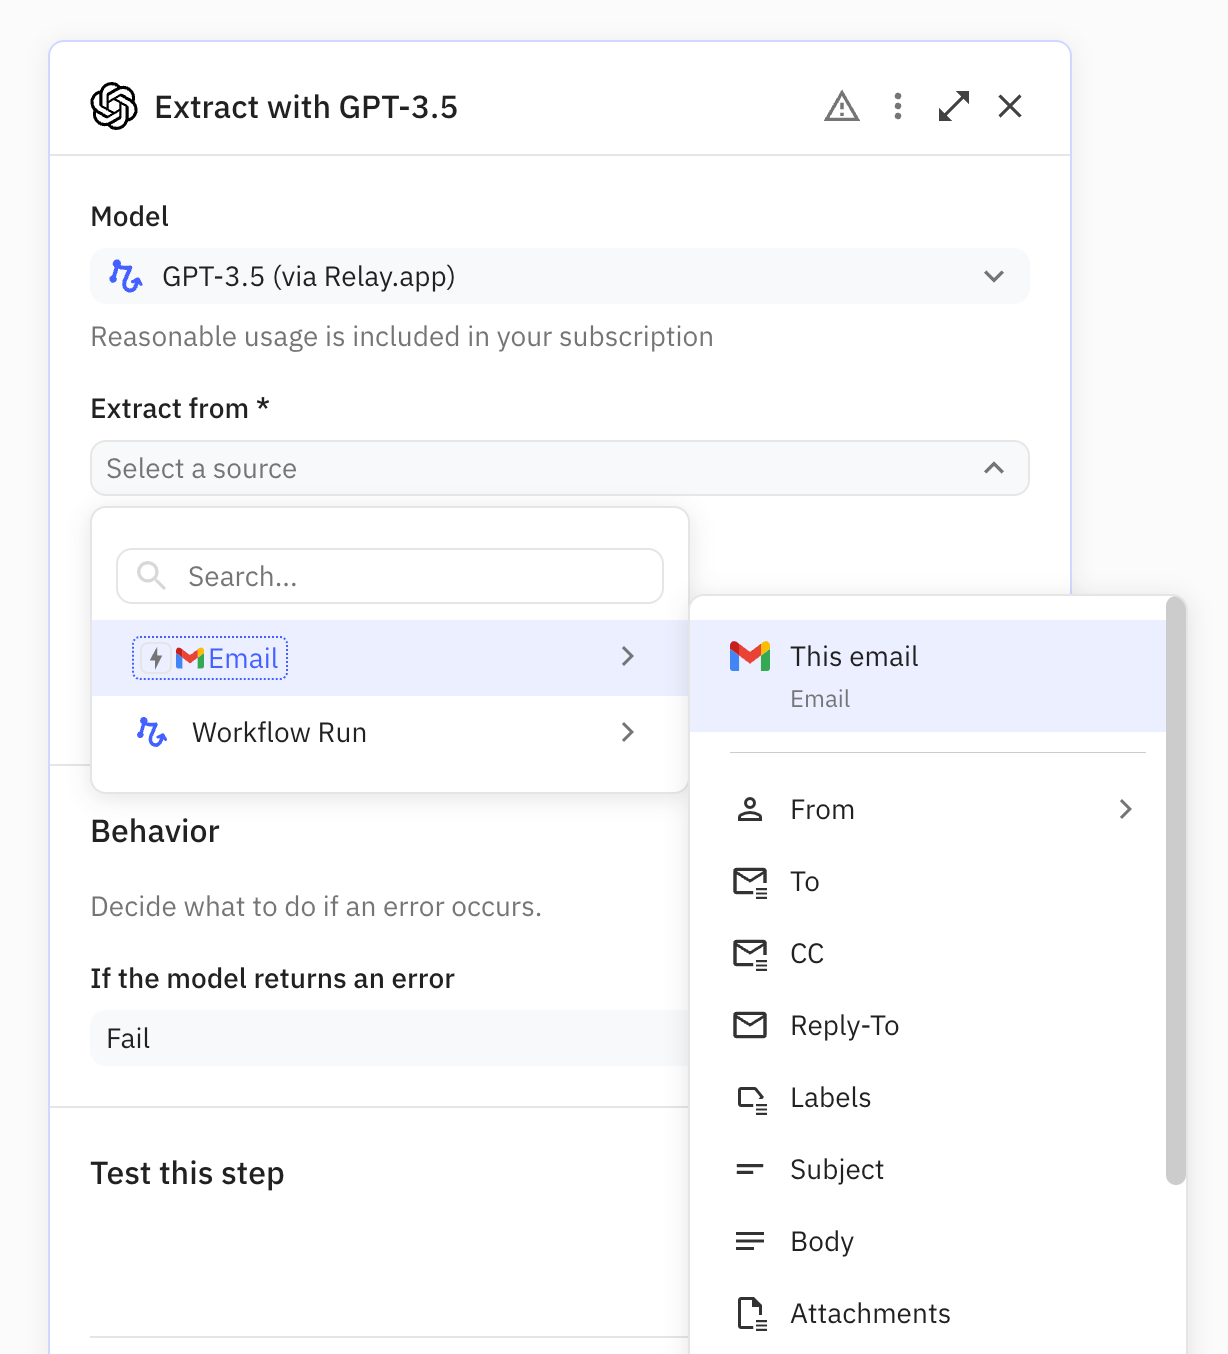
Specify the extraction source
Next, we’ll need to specify where we want to extract data from. In our case, we’re going to extract data from the invoice email we received that triggered the workflow run.
You’ll likely want to select ‘Entire email’, as it will include all metadata of the email, including any attachments it might have. You may also choose to be more specific, such as only picking the message body as the extraction source.
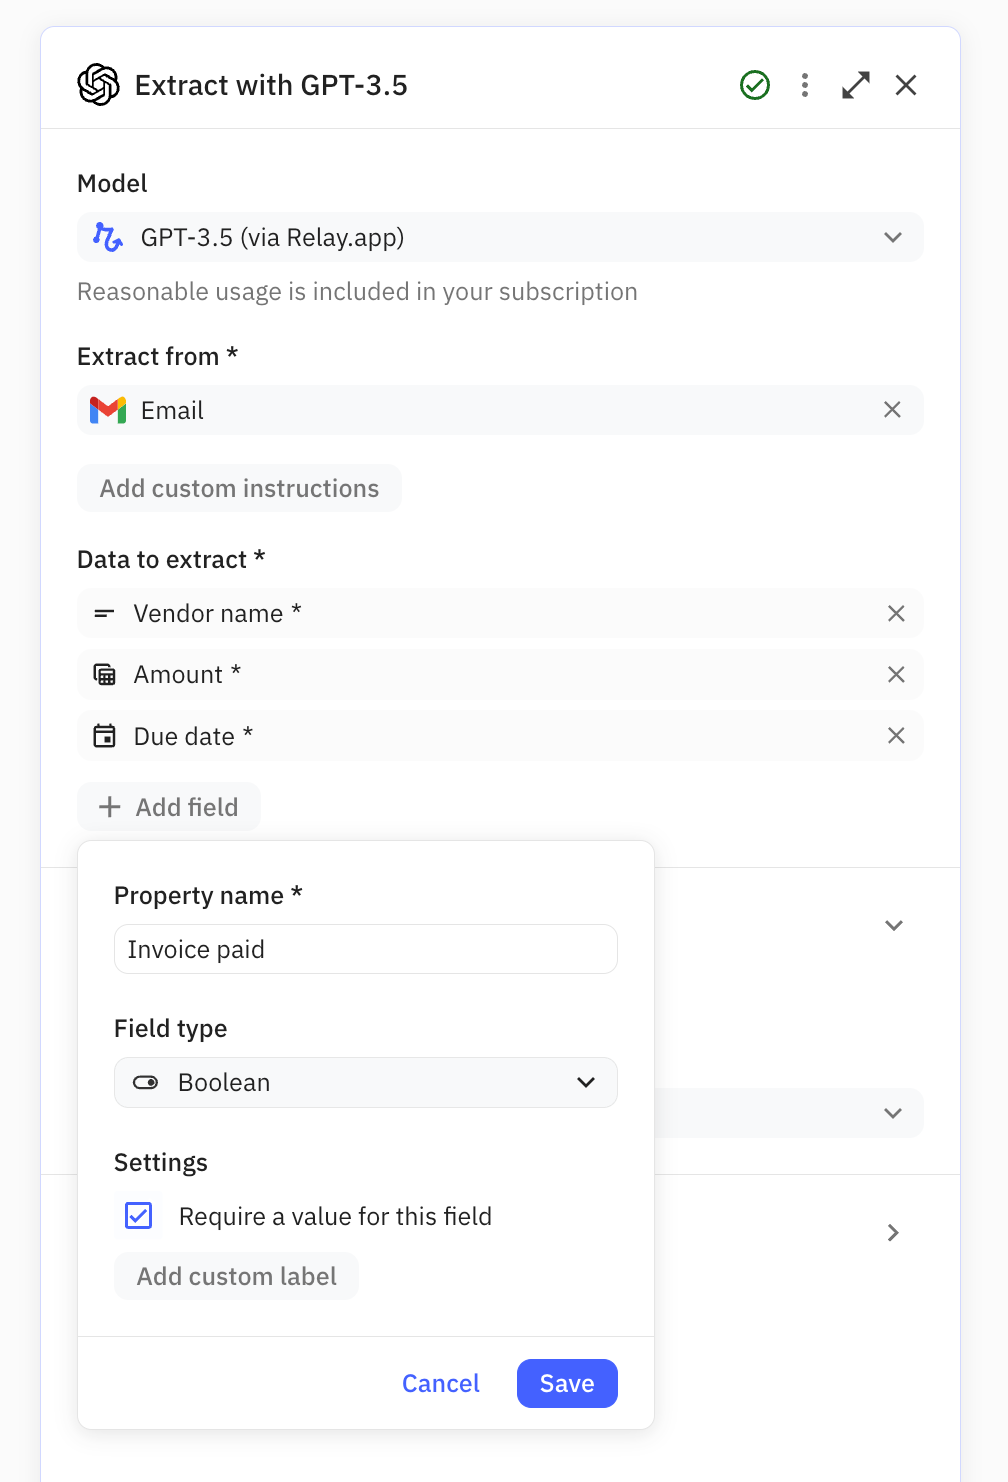
Define what data should be extracted
And finally, we’ll need to specify which data we want to extract from the email. To do so, we’ll need
- Give a description of the data we want to extract
- Specify the ‘type’ of said data (e.g. whether we expect text, a number, or a date)
Let’s say we want to extract the following data from the invoice email:
- The vendor name as text
- The amount as a number
- The due date as a date
- Whether the invoice has been paid as a boolean
Each of these fields may be set to be required (default) or optional. In the latter case, the step will still continue if the AI model is unable to extract this piece of information from the source.
We can also optionally tell the step to continue executing the run in case the AI model gives an error.
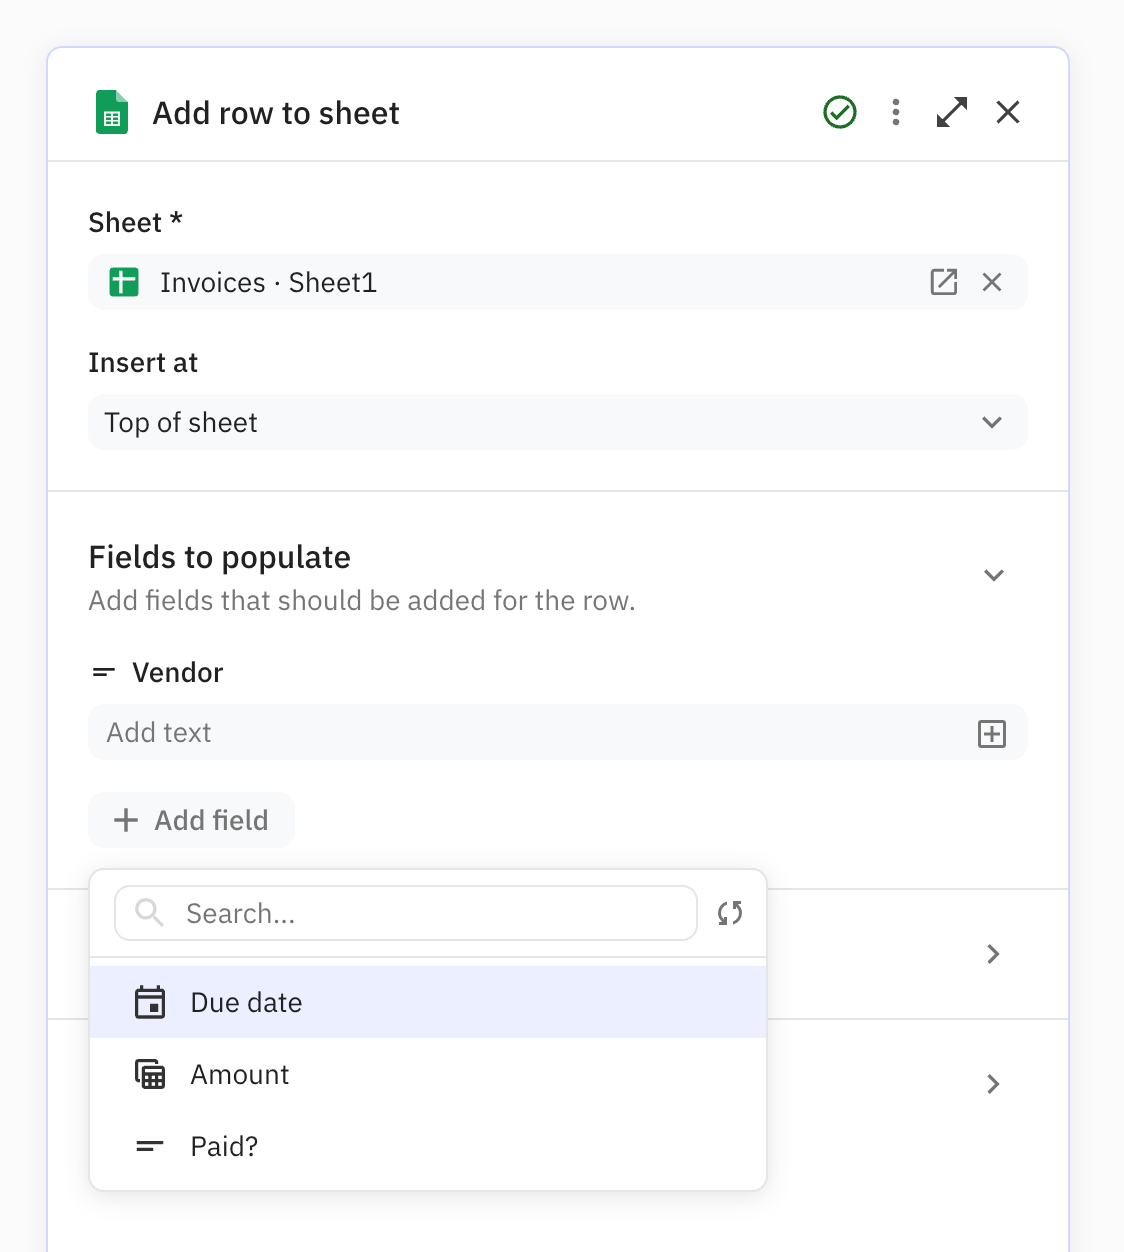
3. Configure a ‘Google Sheets - Add row to spreadsheet’ step
Lastly, we’ll want to add the extracted information to a spreadsheet.

After adding a Google Sheets ‘Add row to spreadsheet’ step and selecting the right spreadsheet, we’ll select all the columns to populate.
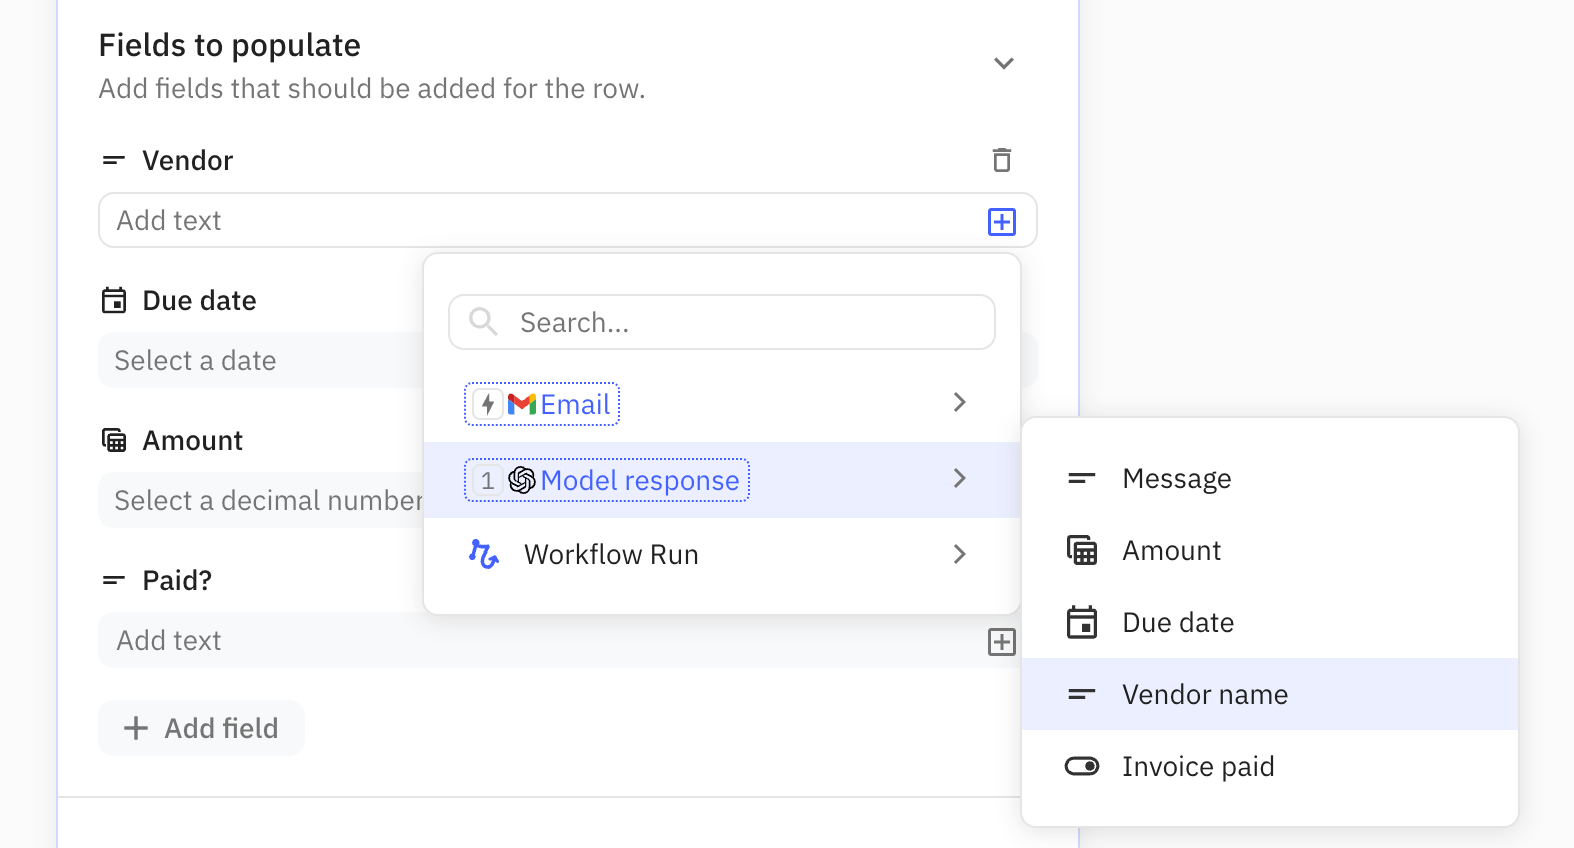
Using data from the AI model’s response
When populating the individual columns, we can easily refer to the data that was extracted by the AI model via the ‘Model response’ object in the data picker.
4. Test your workflow
After you’ve wired up all inputs in the Google Sheets step, it’s time to test the workflow. To do so, click ‘Start a test run’ and select a recent invoice email.
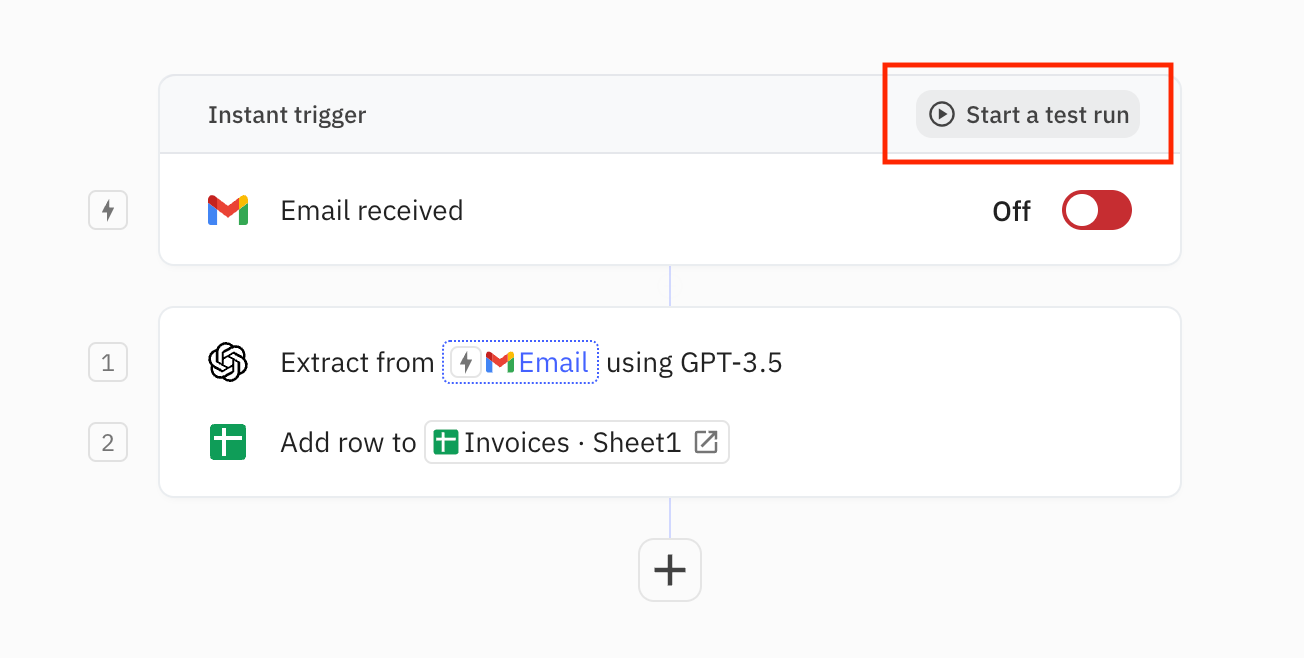
Next, click ‘Create test run’ and see how the information from that email is extracted and automatically added to the spreadsheet.

And that’s it! All that’s left is turning on the workflow and invoice information from all newly incoming invoice emails will be automatically extracted and inserted into the spreadsheet.